
Adelaide 1994 Part 3 – The Diorama

The most important part of any diorama is the planning phase; it’s here that you can make sure that you are capturing all you set out to in your model, by analysing and refining the setting. With this model, this is a fact that I would be reminded of later in the process!! For me, the easiest way to start formulating the composition is on a piece of paper on which I then draw the outline of the diorama using the cars themselves as props. In order to gauge the size of the “stage”, I use two pieces of card cut at right-angles, which can then be moved to adjust the size of what will become the base:

This diorama started life back in late 2016 shortly after I had completed the Suzuka 1989 piece. Much as with the previous diorama I worked on, I was inspired to capture this moment in miniature due to its notoriety and the fact that I can vividly remember watching the race as an 11 year old, being outraged by Michael Schumacher’s misdemeanour in taking Damon Hill’s Williams Renault out of the race in order to secure this first world championship. Whilst some still consider this to have been a racing accident, for me Schumacher’s later conduct at Jerez in 1997 and at Monaco in 2006 make it very clear where he set the bar with regards to sportsmanship and his ruthless desire to succeed.
Having decided on a size and ordered a wooden base, I then built a mock-up of the section to the side of the track from foam board to get a sense for how the scale and composition would work in three dimensions.

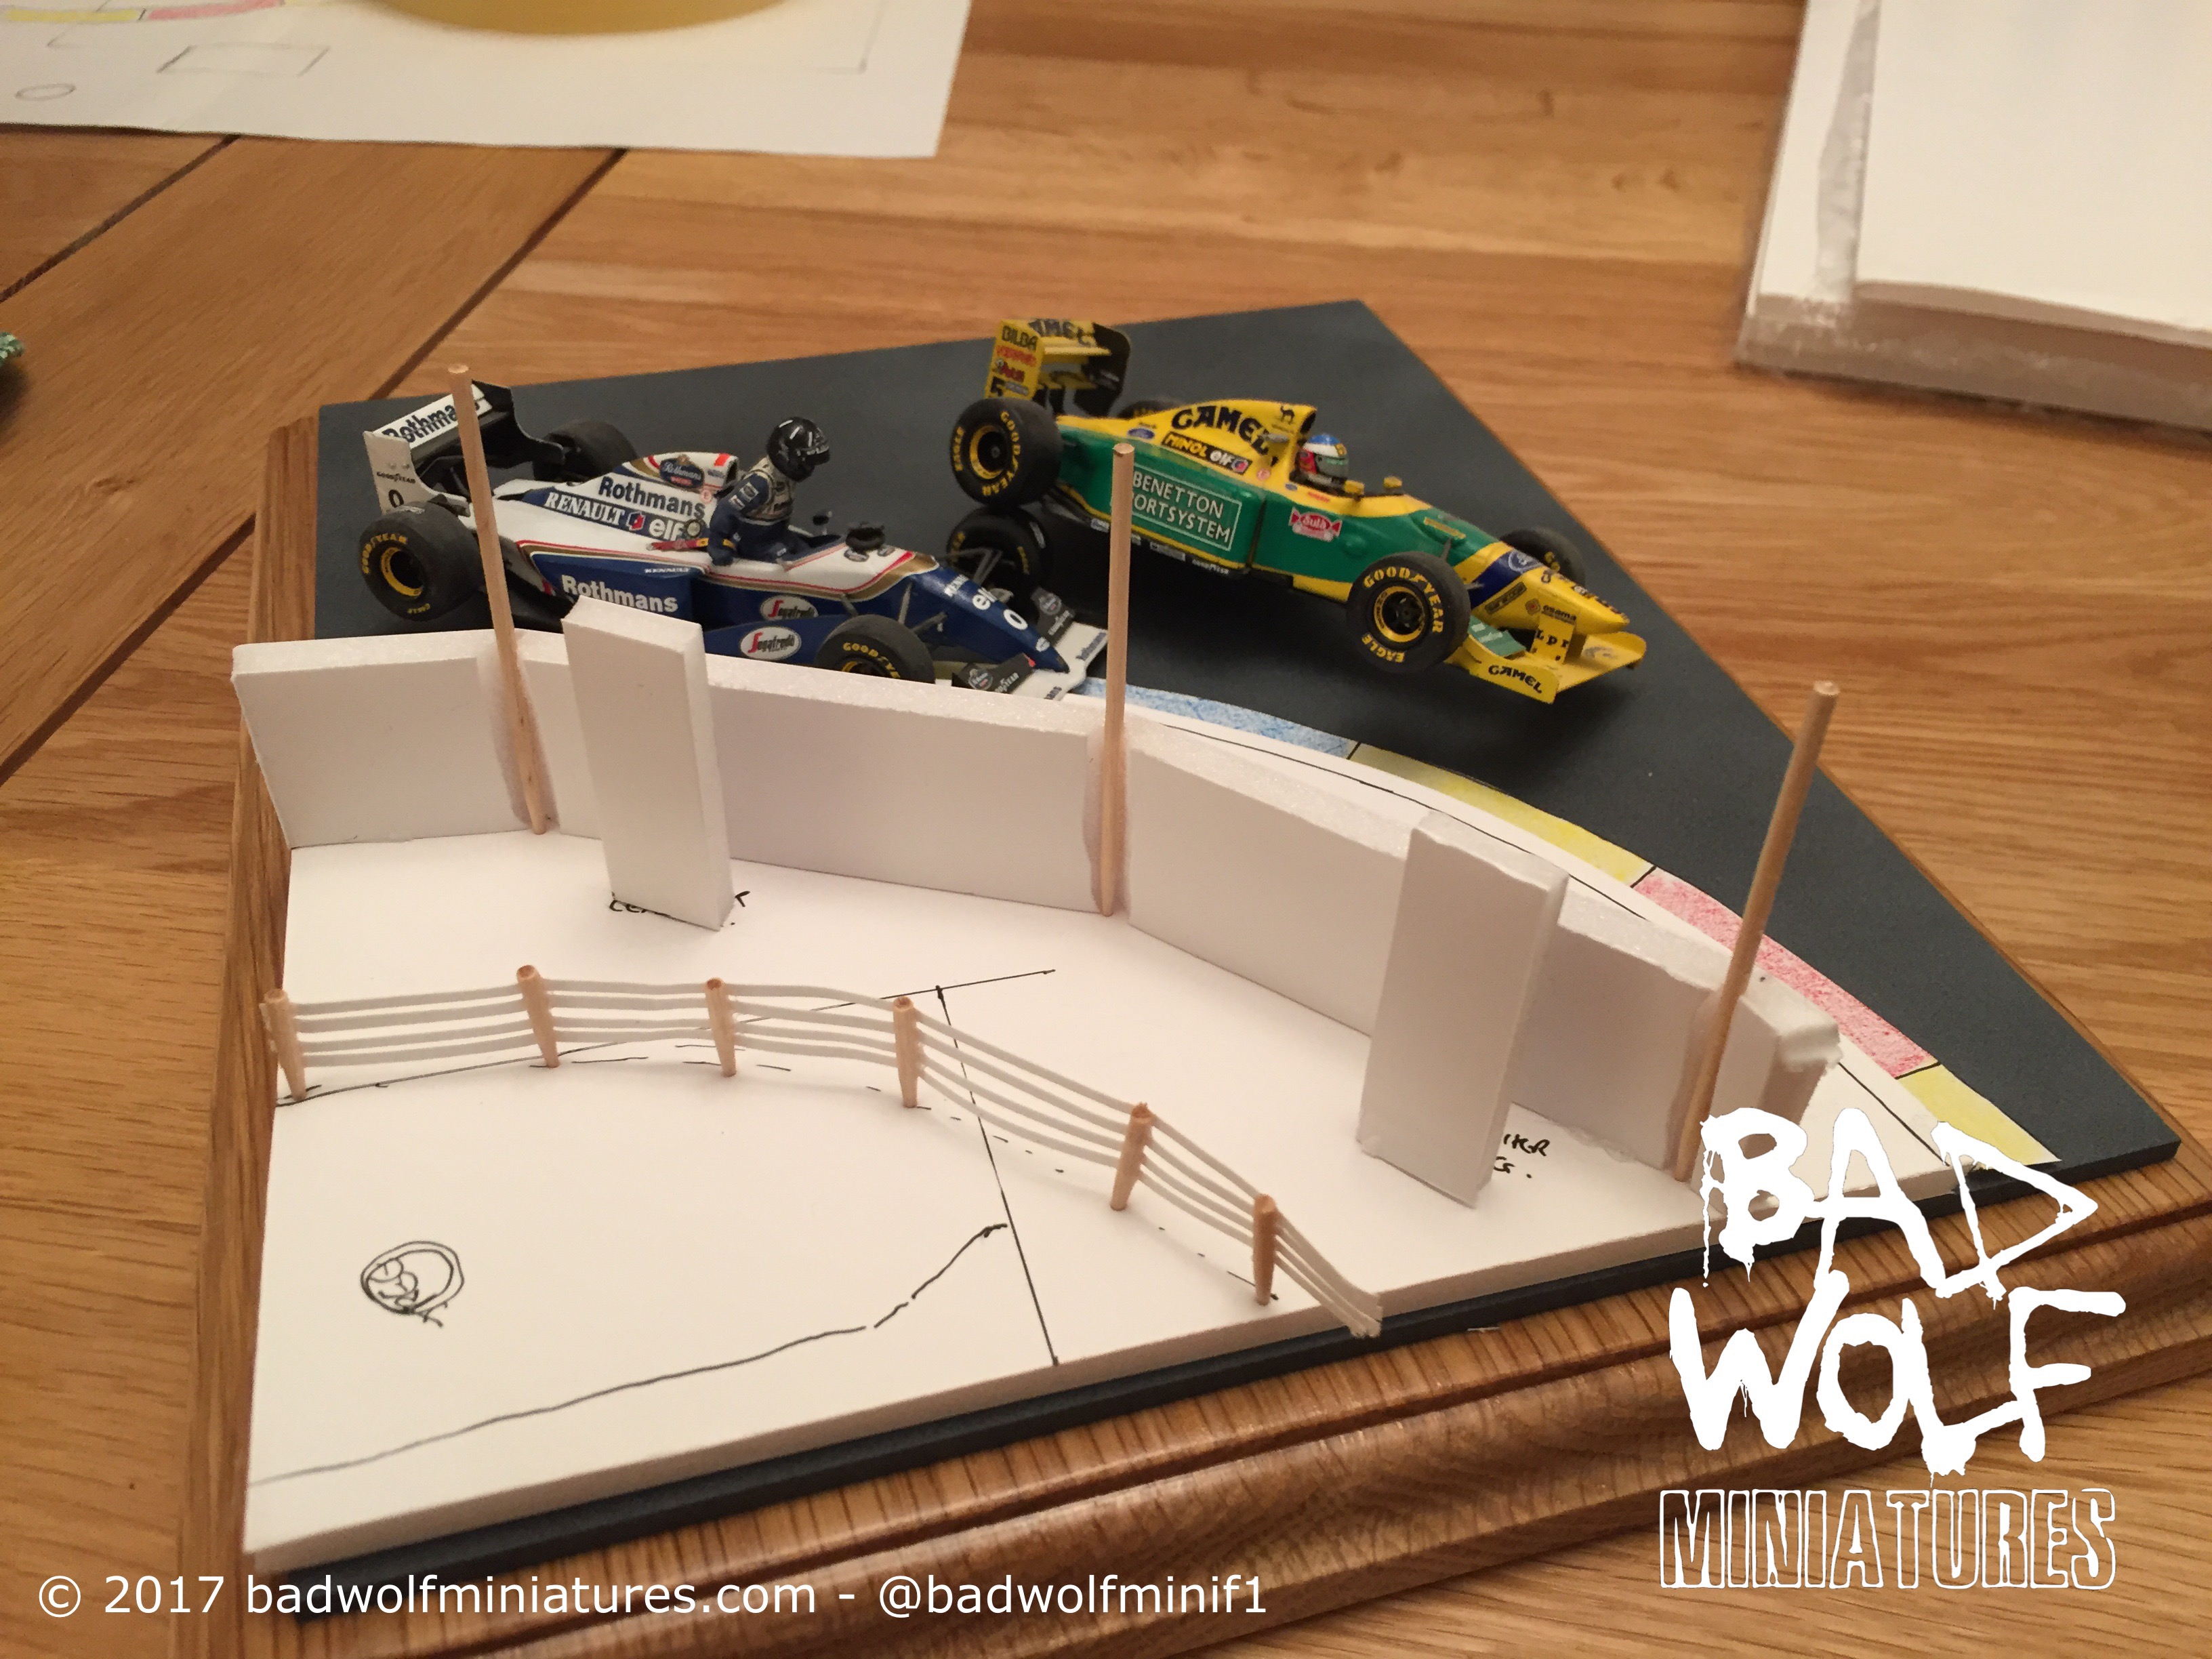
Once this was complete, I started fabricating the “pavement” and kerb sections from thin balsa wood. The large corner piece was cut with a scalpel blade, before being glued into position with contact adhesive. Once this was dry the track section was masked off, and the inner section repeatedly painted and sanded using finishing paper and grey primer in order to fill the grain of the balsa and give a smooth finish.
At the same time, I referred to as many photographs of the scene as I could find in order to determine what was behind the concrete barrier on the inside of the corner. The photographs I found all made that area very dark and shaded, which meant it was hard to ascertain the details of the space. In addition to photographs from 1994, the street circuit nature of the Adelaide track meant that Google Streetview was also available:
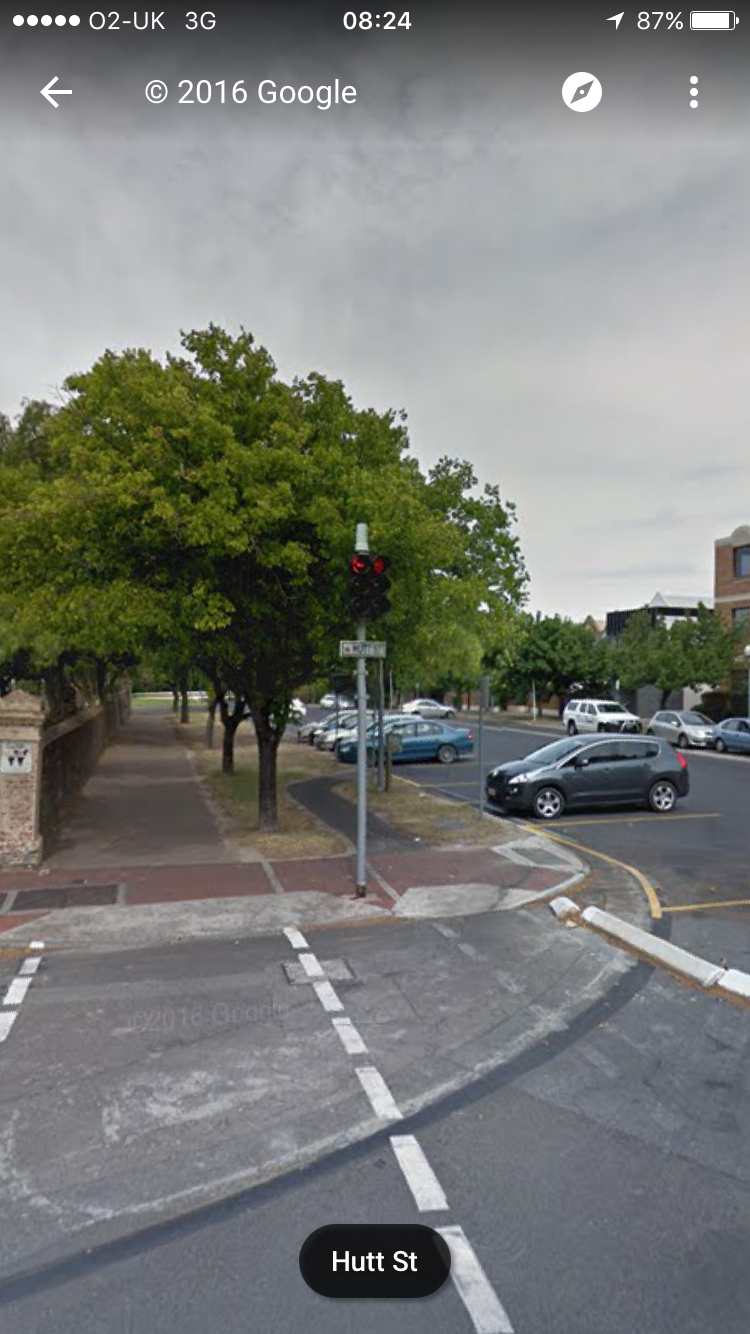
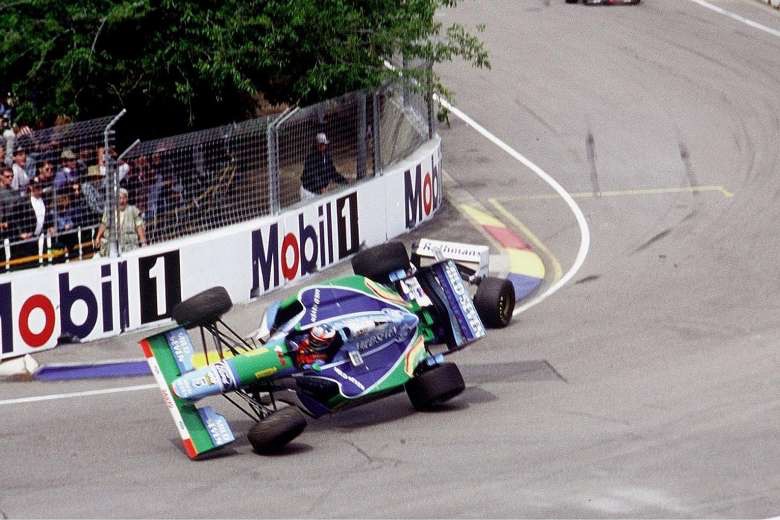
The Adelaide circuit hasn’t been used for Formula 1 racing since 1995, but the circuit is still used for Australian saloon car races. The Streetview images showed that the inner line of the circuit does not form part of the normal everyday pavement, which is set further back and paved in red brick. There are also witness marks on the Tarmac where a (presumably) concrete inlay is used to fill-out the inside of he corner. The reference photographs all highlighted a large tree on the inside of the corner, but Streetview showed that the tree (if it was the same tree!) was quite a way further back than the reference photographs suggested. I wanted to include the tree, as I felt this was an integral part of the scene, so decided that a small degree of poetic licence would be necessary to pull the scene together.
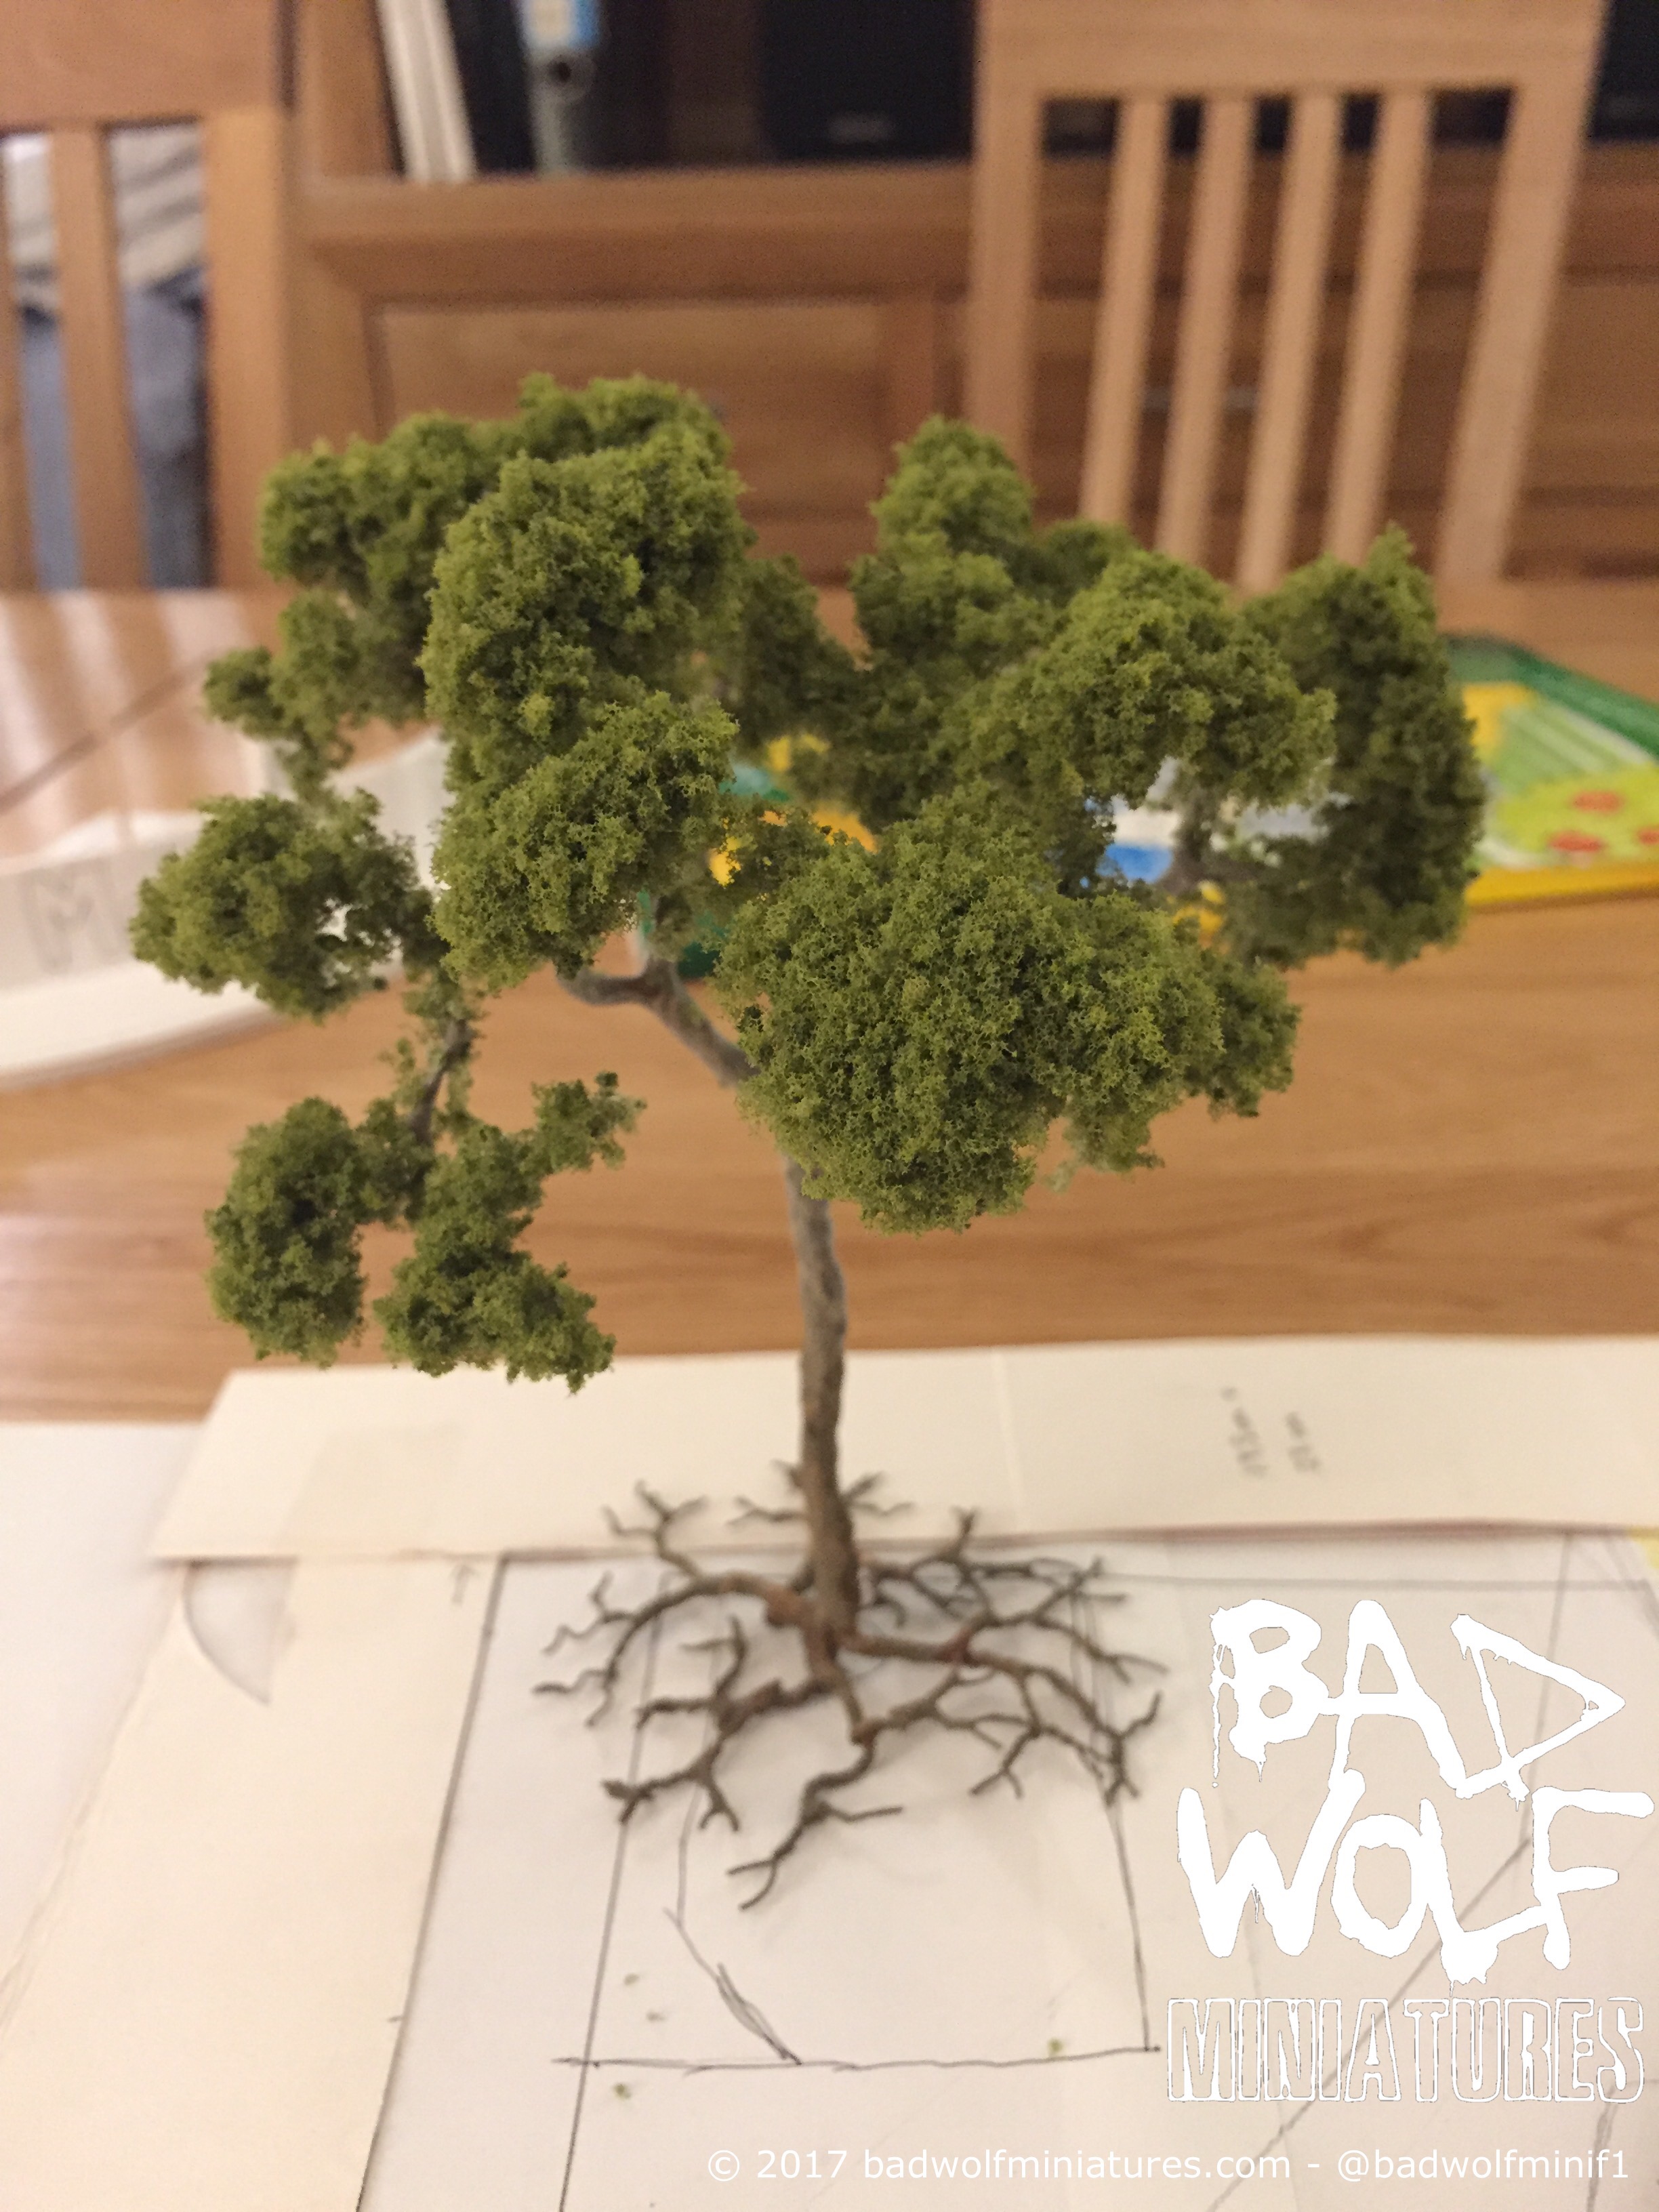
Having decided to include the tree, the next challenge was to make one!! For this, I relied upon an instructional video from the magnificent Luke Towan of Boulder Creek Railroad. Luke runs a fantastic modelling website, and his YouTube channel is particularly informative and educational. I won’t try to steal his thunder here, instead you can watch his brilliant tutorial on tree making here:
[youtube https://www.youtube.com/watch?v=0FNQTxX_jT4&w=560&h=315]
Here are some photos of my tree as it evolved from a few pieces of wire into a nice model tree:
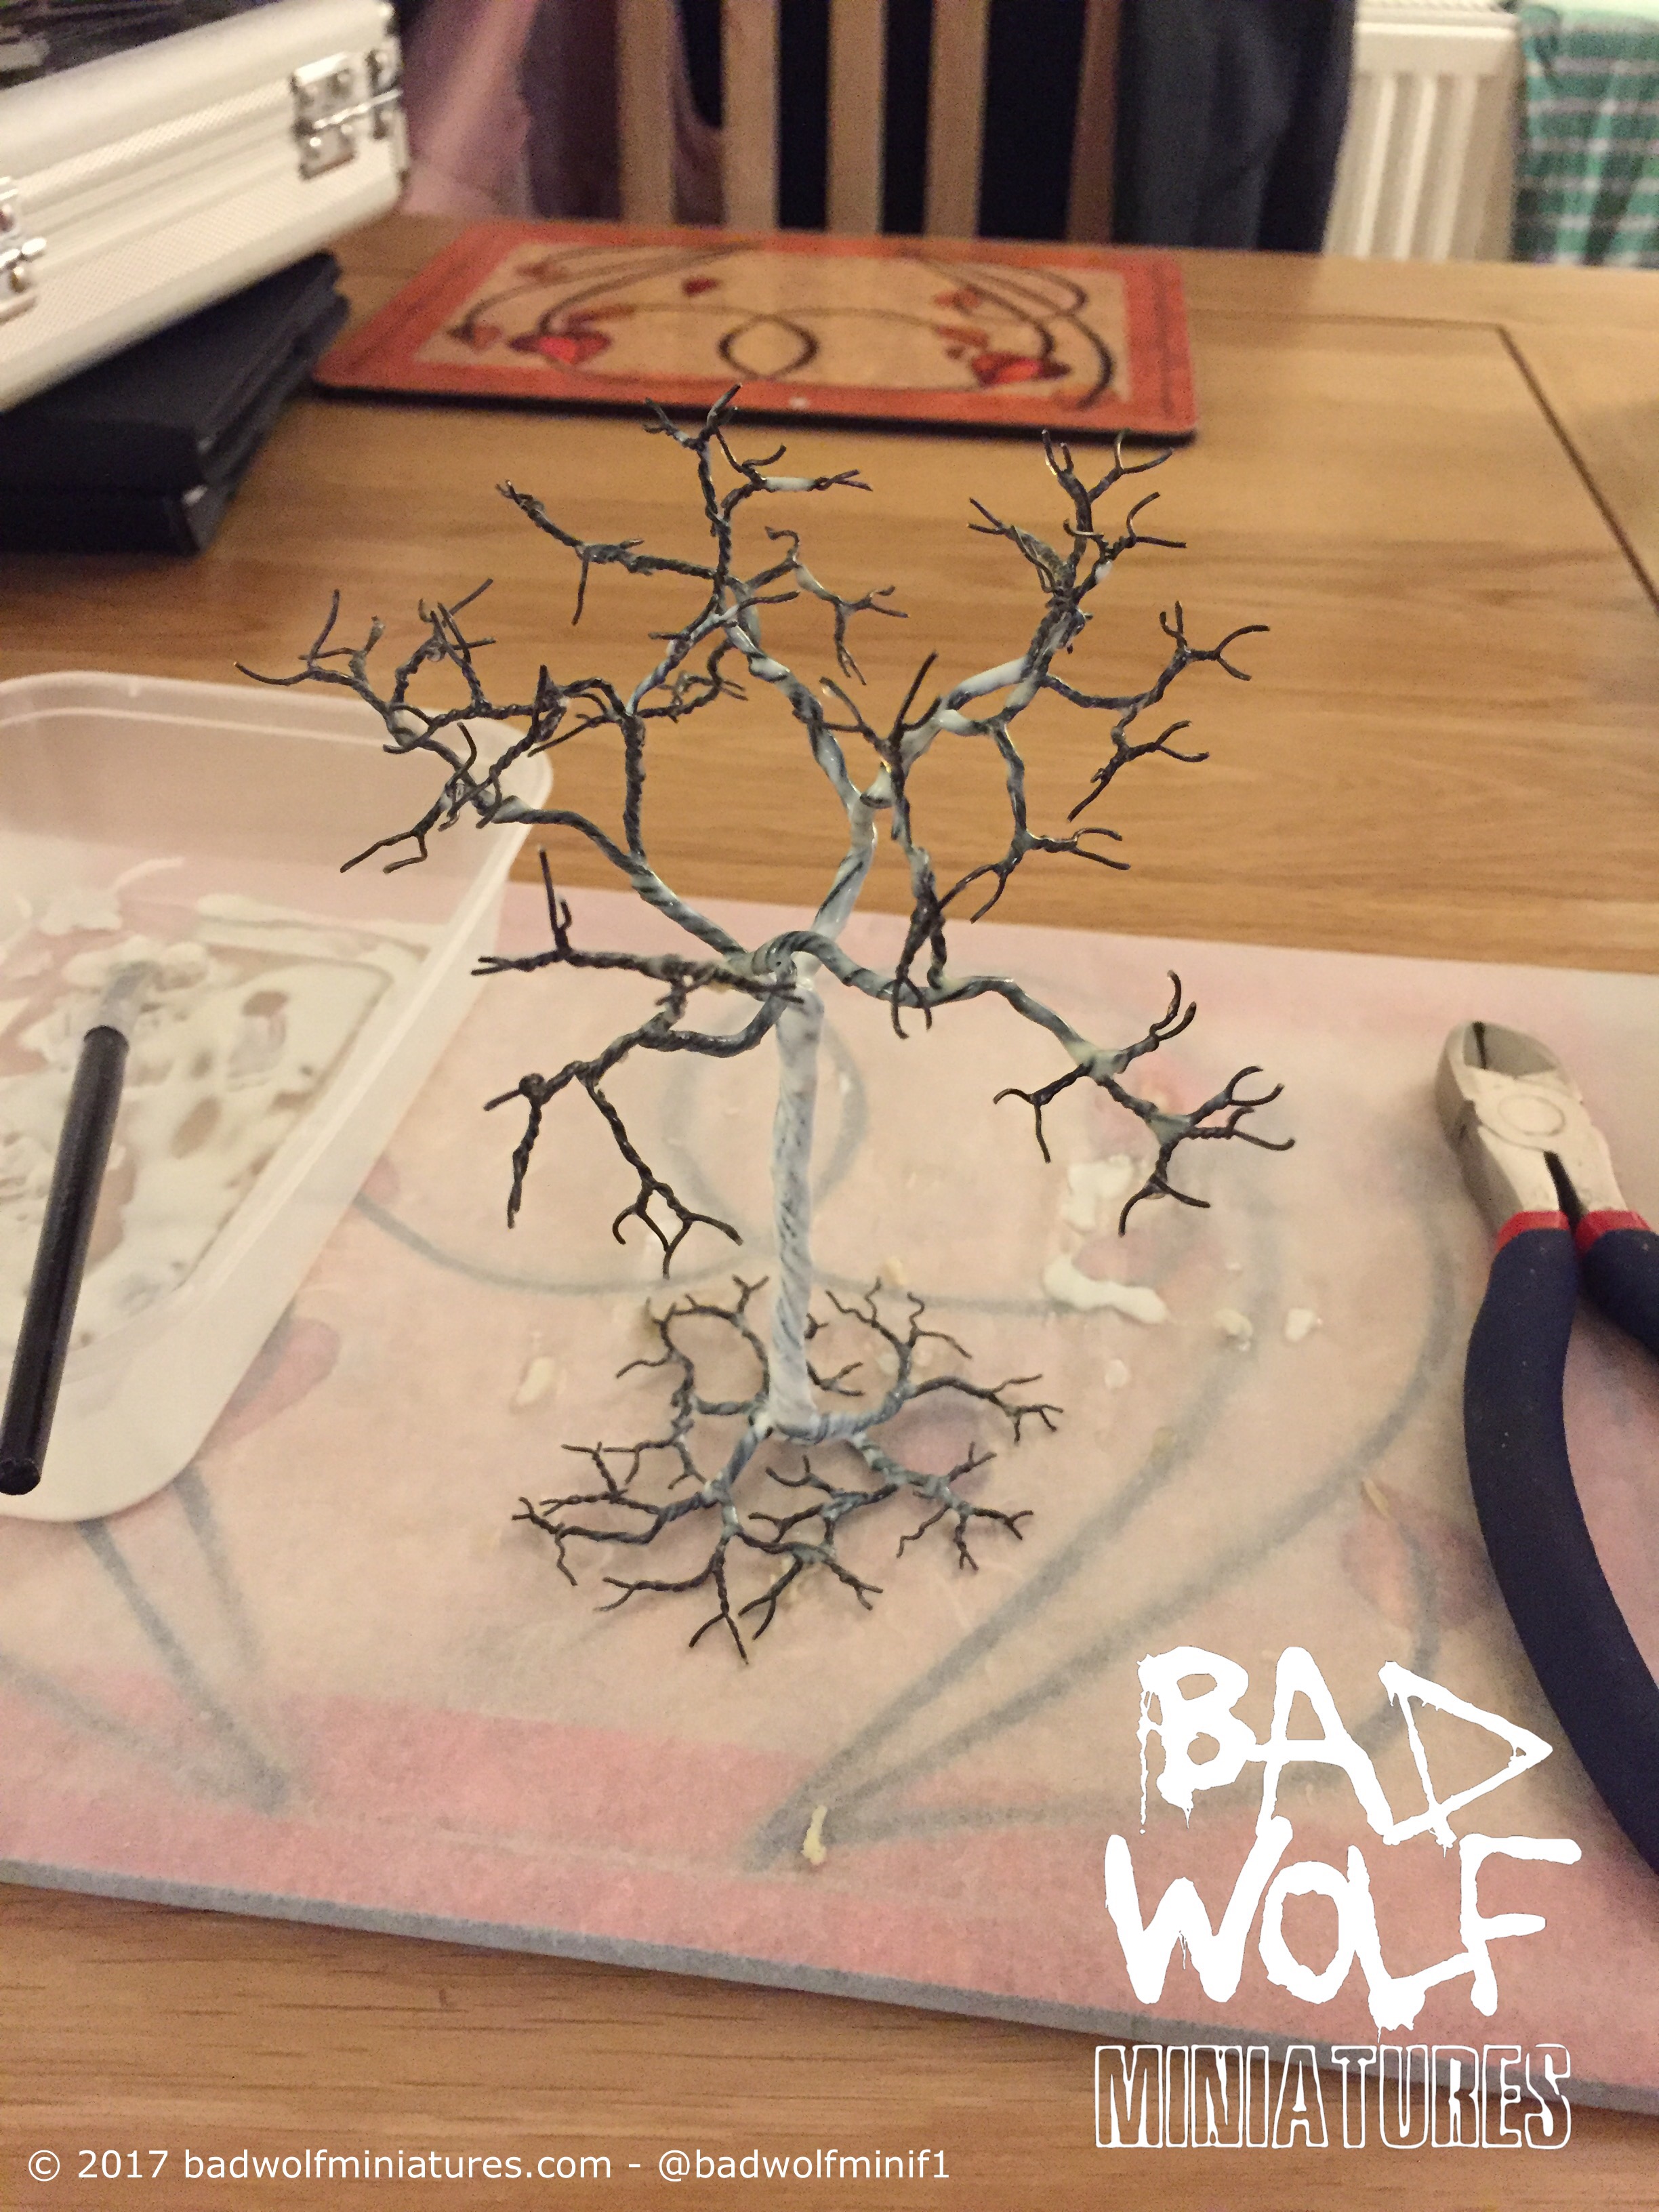
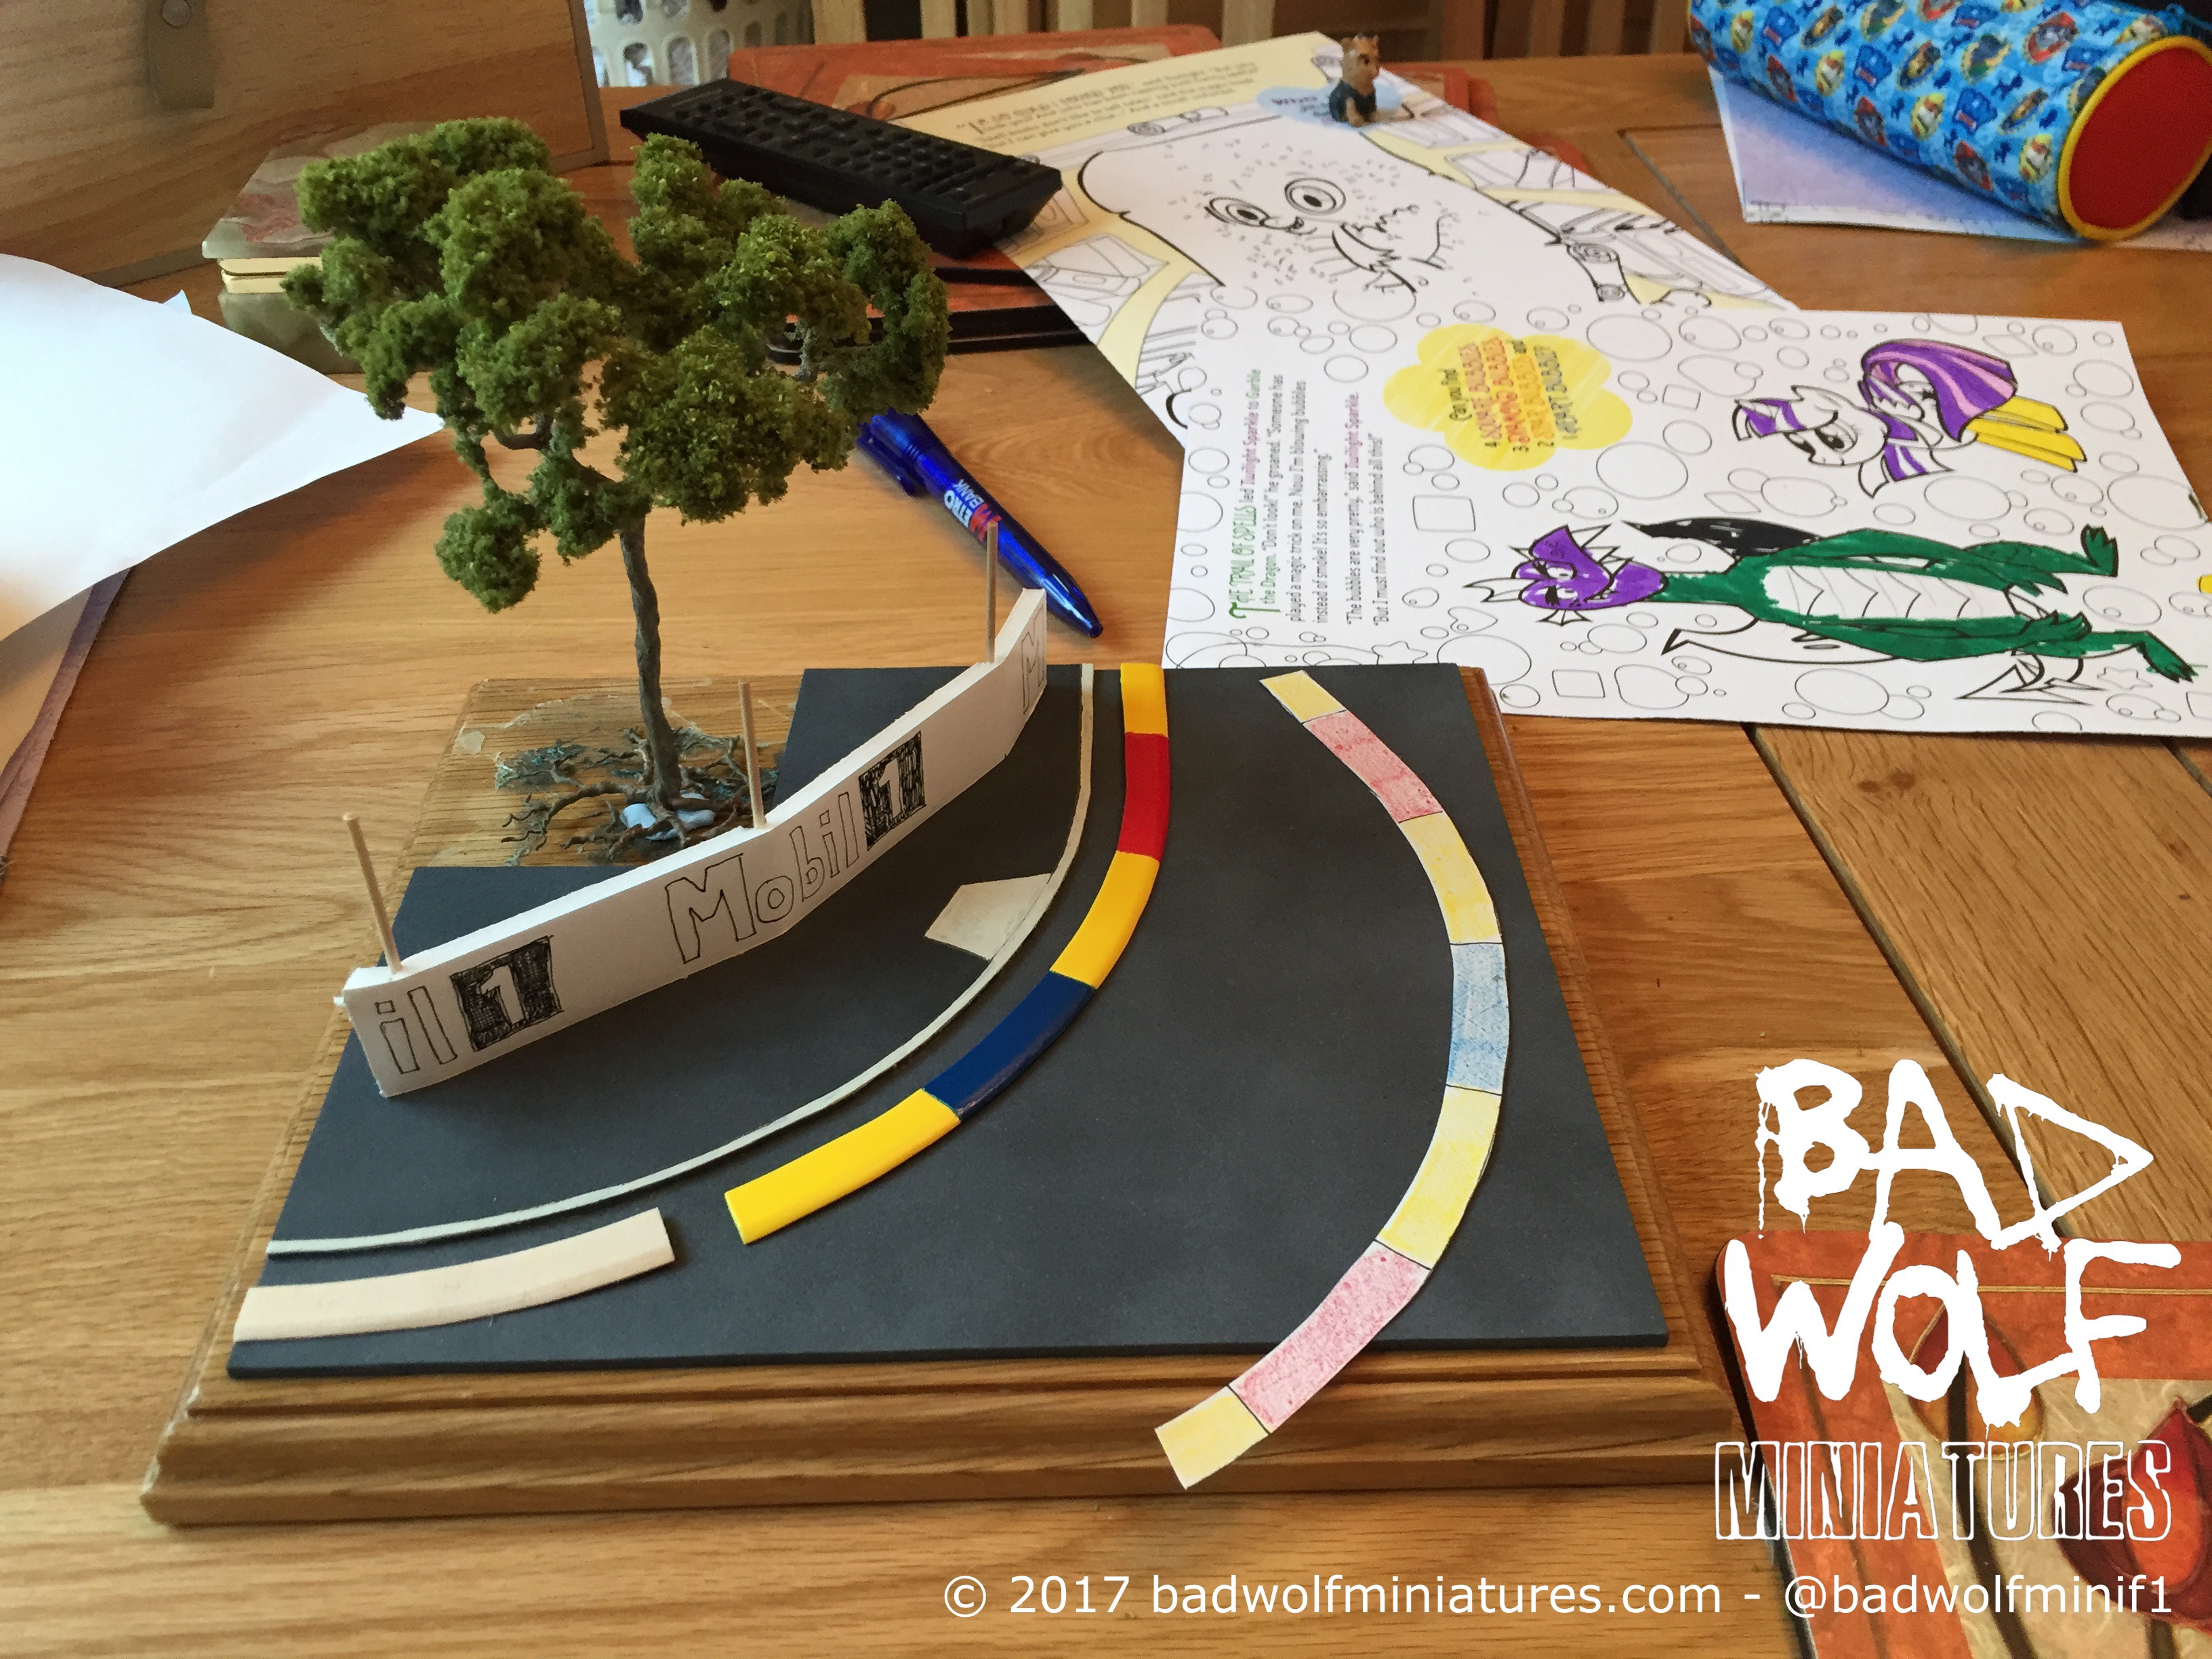
With the tree made, it was time to install it in the diorama. I hadn’t thought this part through clearly enough when I planned the diorama, which meant that I would need to remove part of the pavement/track base in order to create room for the tree.
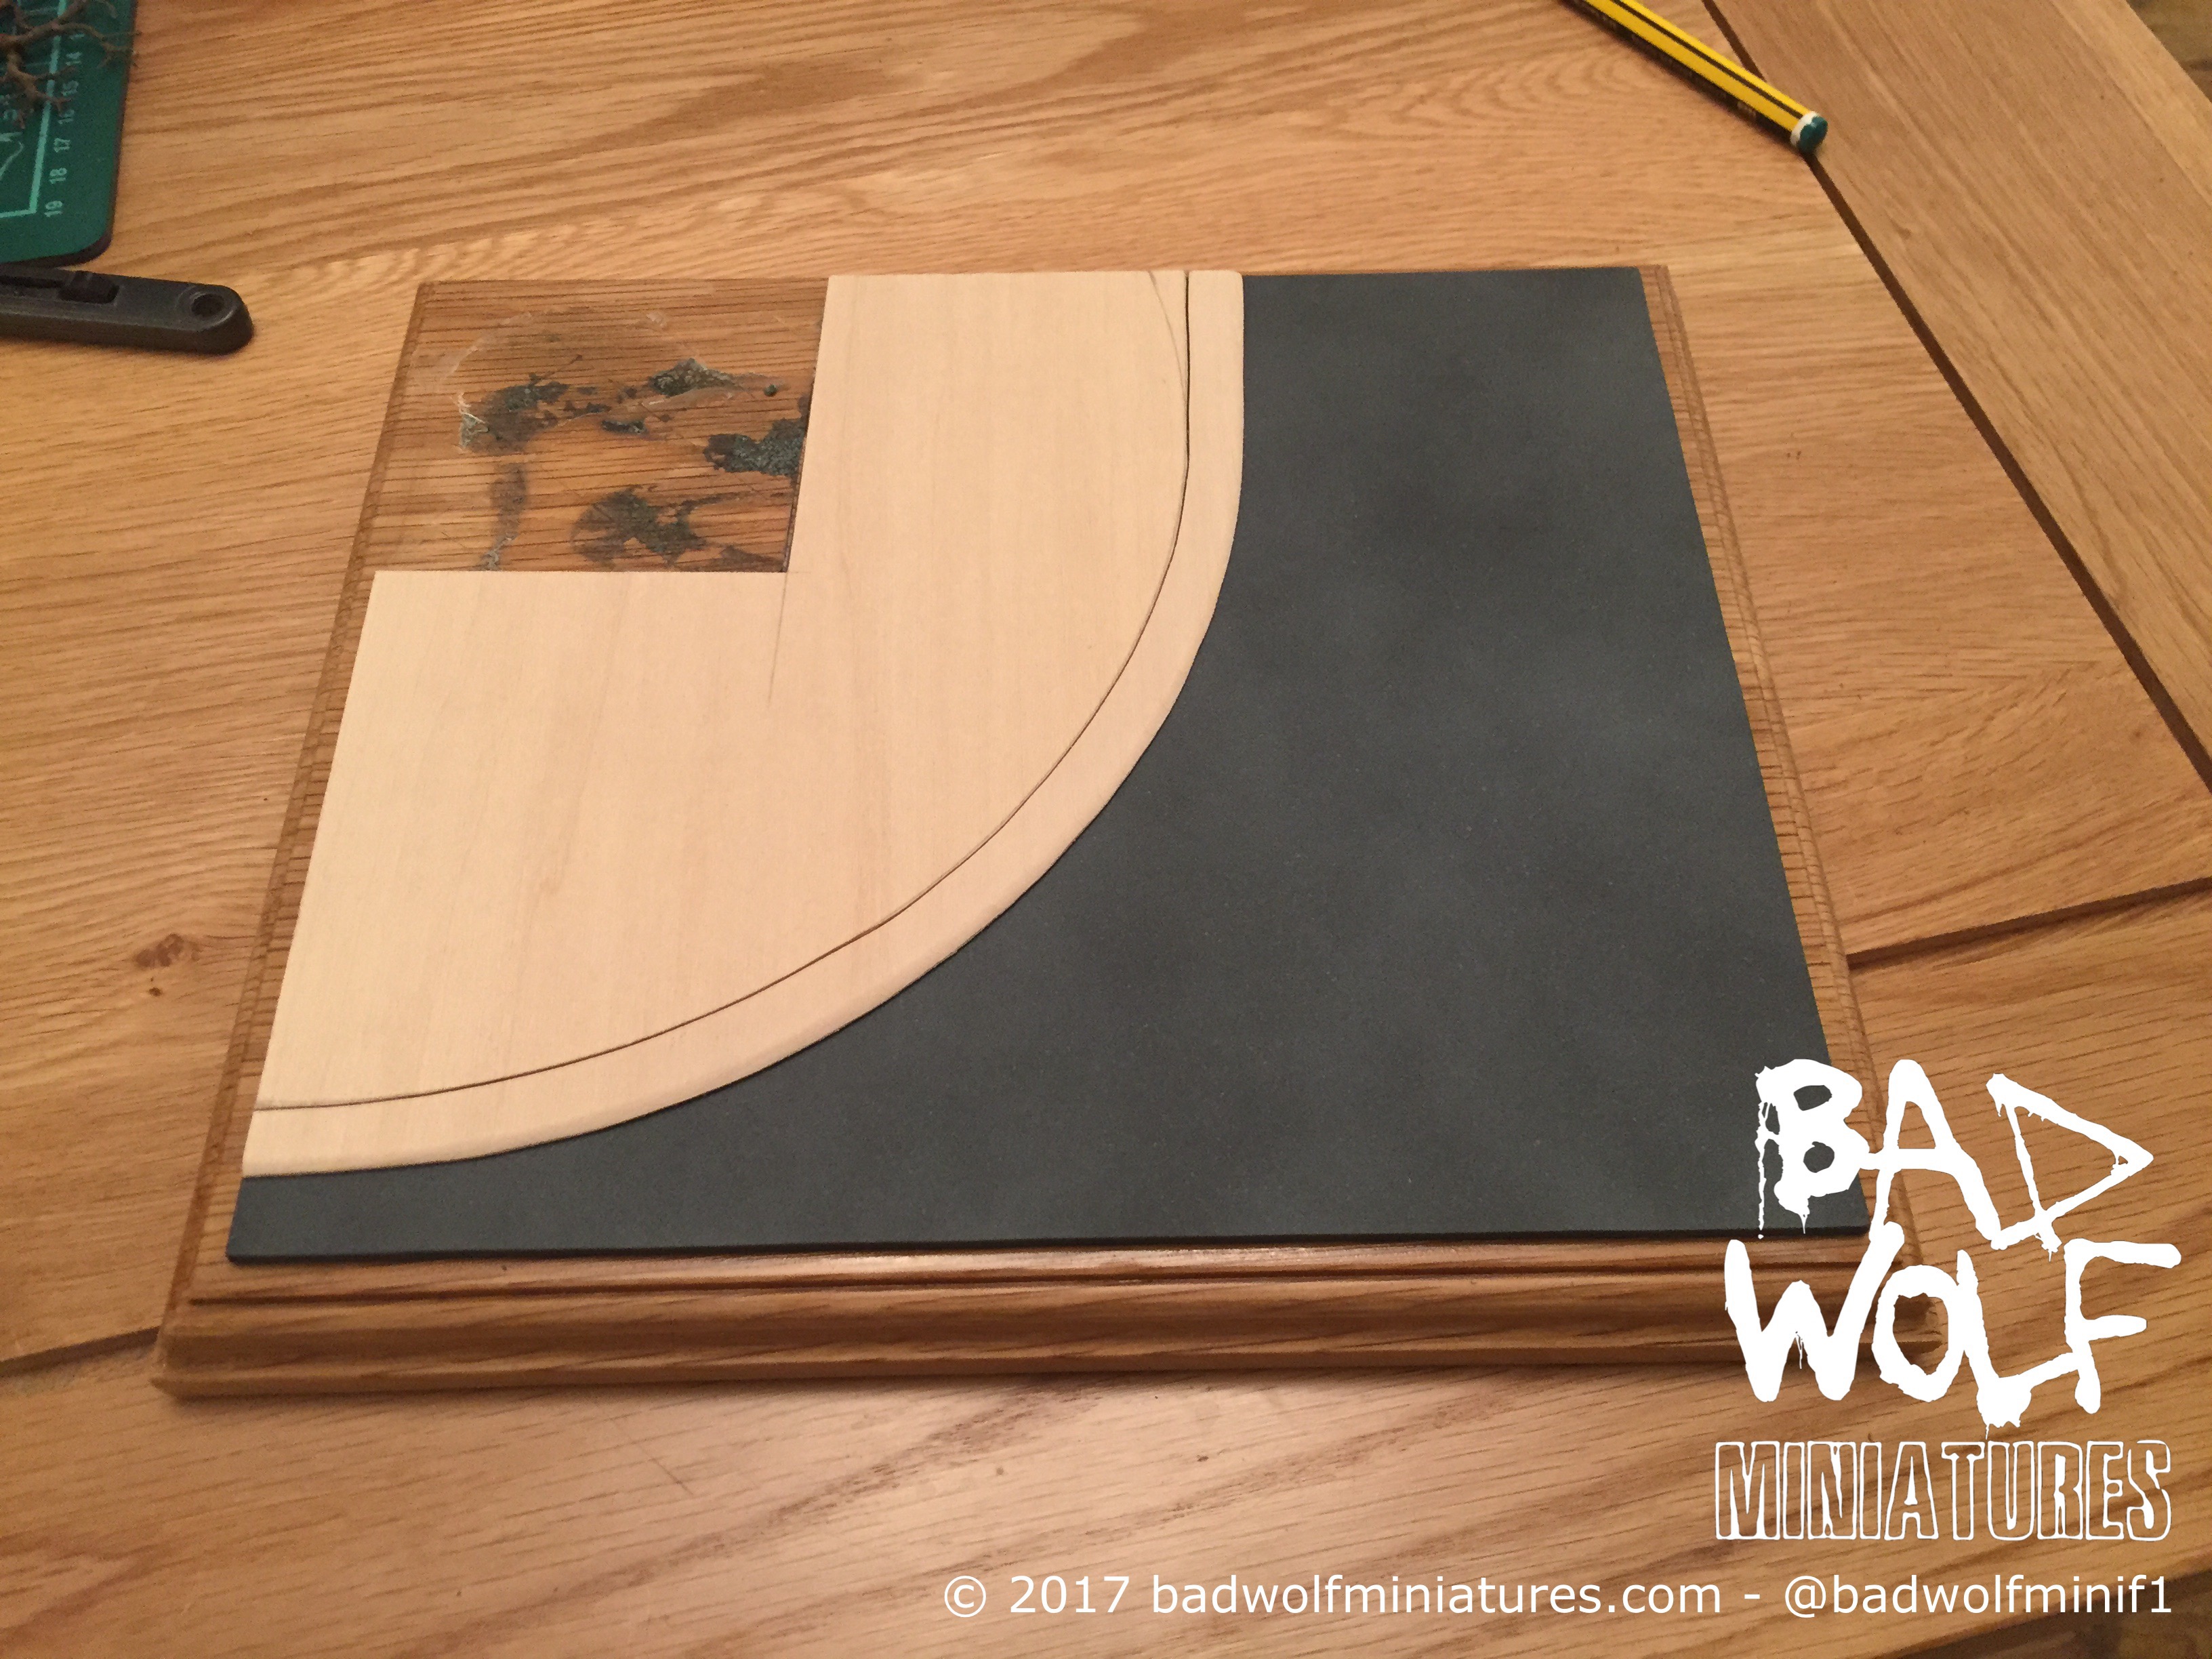
This was done by marking out the section to be removed and then cutting it out using a Dremmel tool. The section was then gently prised from the base to leave a vacant area in the corner of the base:
It was now time to install the tree; I decided to follow the suggestion in the tutorial to “plant” it in plaster of Paris. I built up two small walls on the outside edges using plasteceine and then followed the technique in Luke’s video:
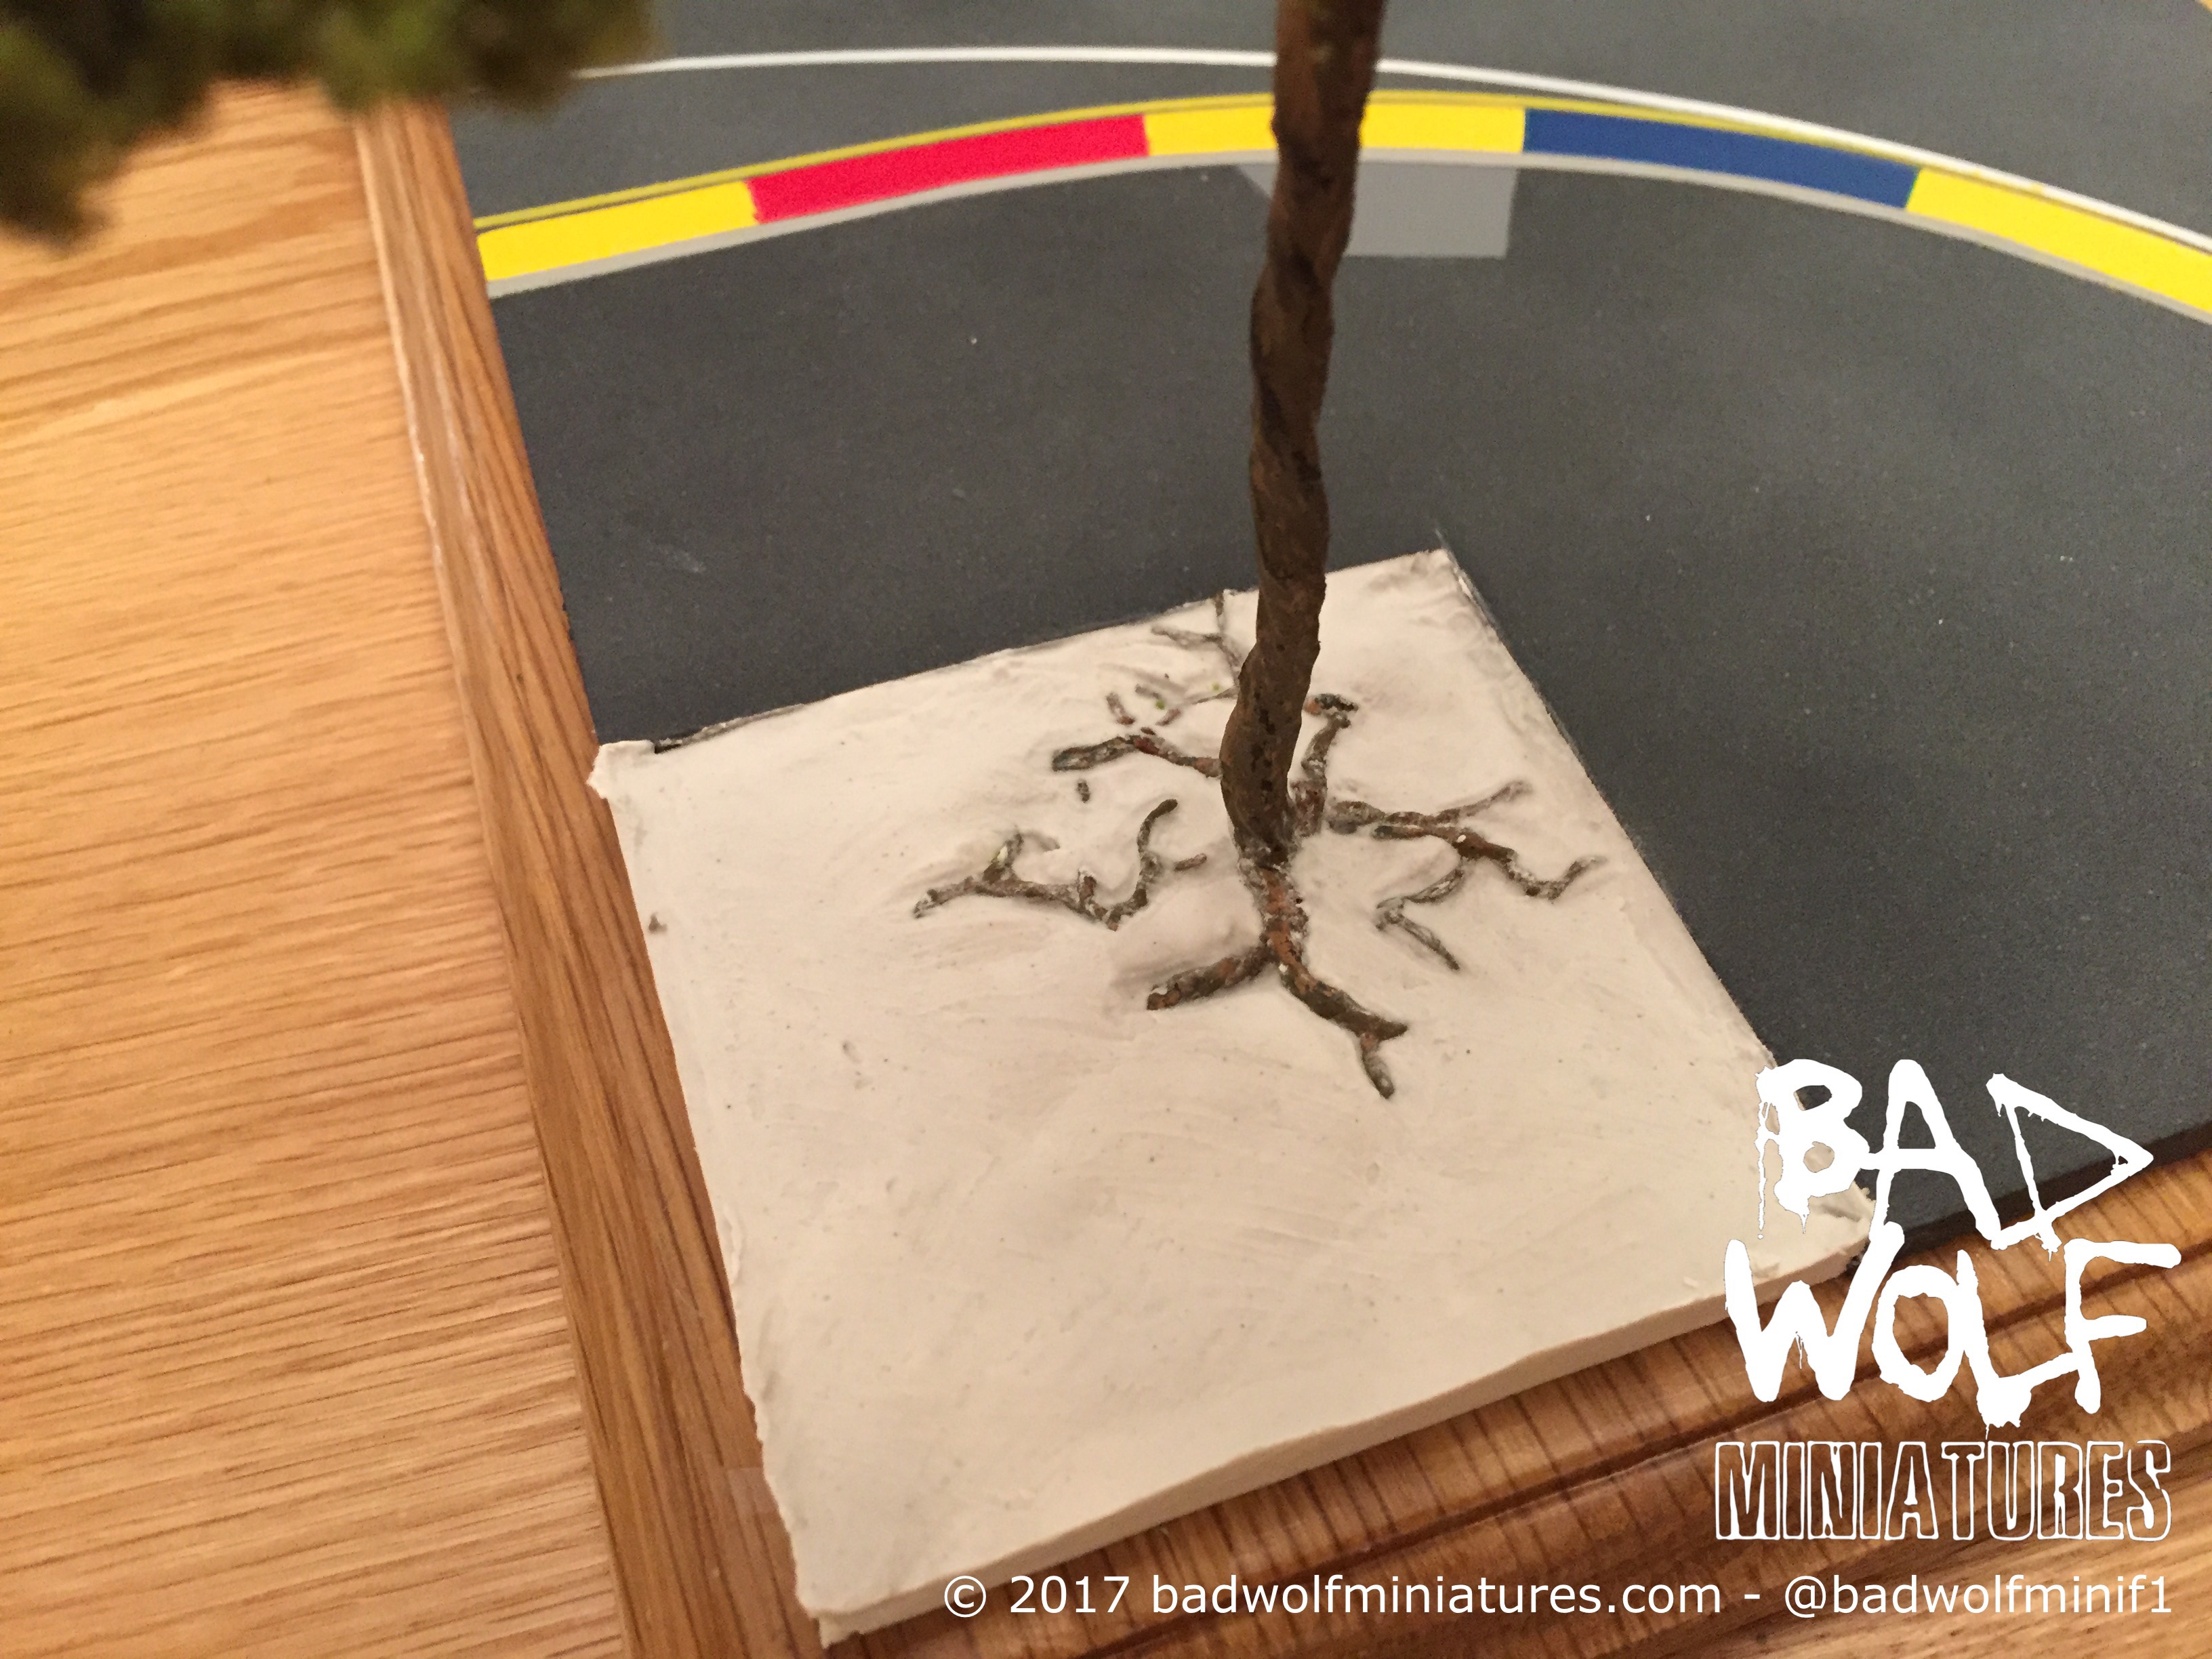
Once the plaster was dry, I then painted it using some watercolours, before applying a layer of Tamiya soil-texture diorama paint. This was then dry-brushed in a lighter brown to bring out some of the surface detail, before a covering of Noch static grass was added.
The next step was to look at the concrete blocks to the side of the circuit. I had made a small section of wall when I built a small Jenson Button diorama, but this time I would need at least three sections of concrete wall; all exactly the same size. I decided that the best way to do this (and to be prepared should I ever need wall pieces such as this again), was to make a silicone mound which I could use to cast the wall pieces in resin. I found a useful old article in an old edition of Fine Scale Modeller, which was really useful. I started by making a wooden pattern from balsa; and this was painted and sanded continually until the wood grain was no longer visible and the surface was completely smooth. It was then painted again using a gloss topcoat (I wasn’t fussy about the colour) to ensure a smooth finish.
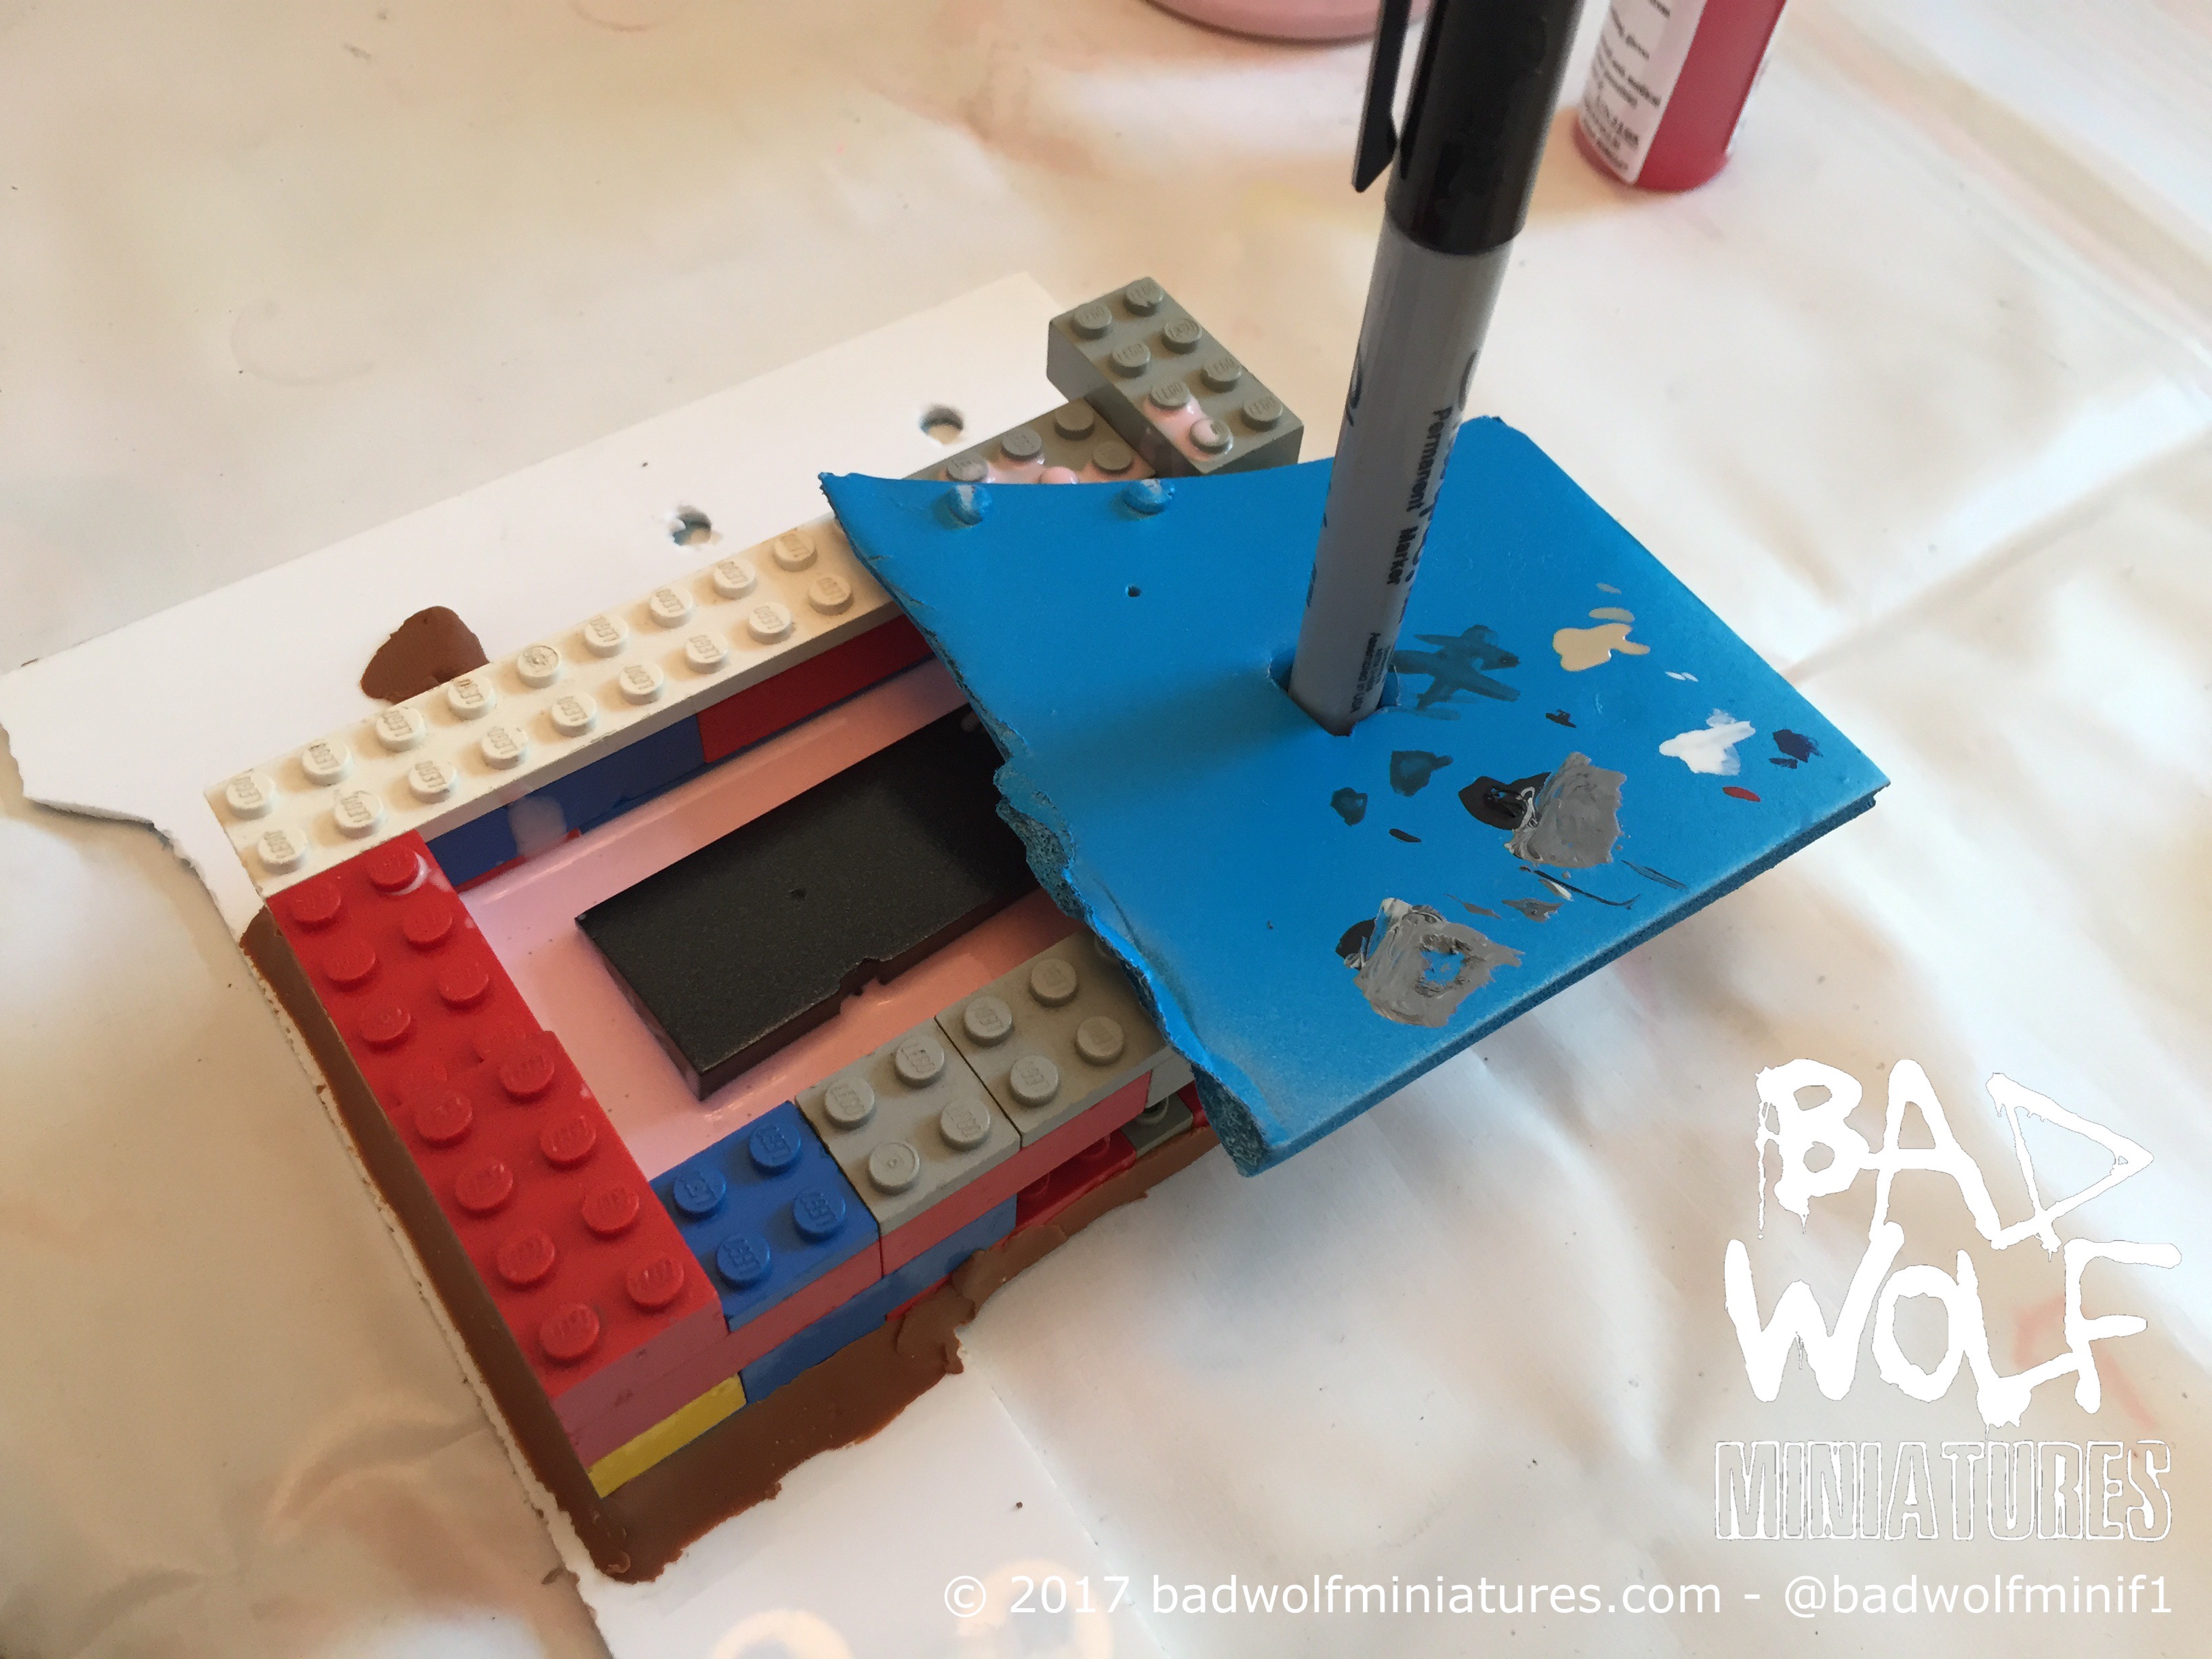
I started to make the mold by building a small “case” from Lego bricks which was secured to an old piece of Perspex using plasteceine. The wooden pattern was then suspended in the case using small pins.
I then half-filled the mold with the silicone. At this stage I also suspended a pen in the silicone as this would provide a “key” to help the two halves of the mold align later.
After the silicone had set, I removed the pen and sprayed the whole area with silicone release agent. I then poured the second half of the mold with some freshly mixed silicone.
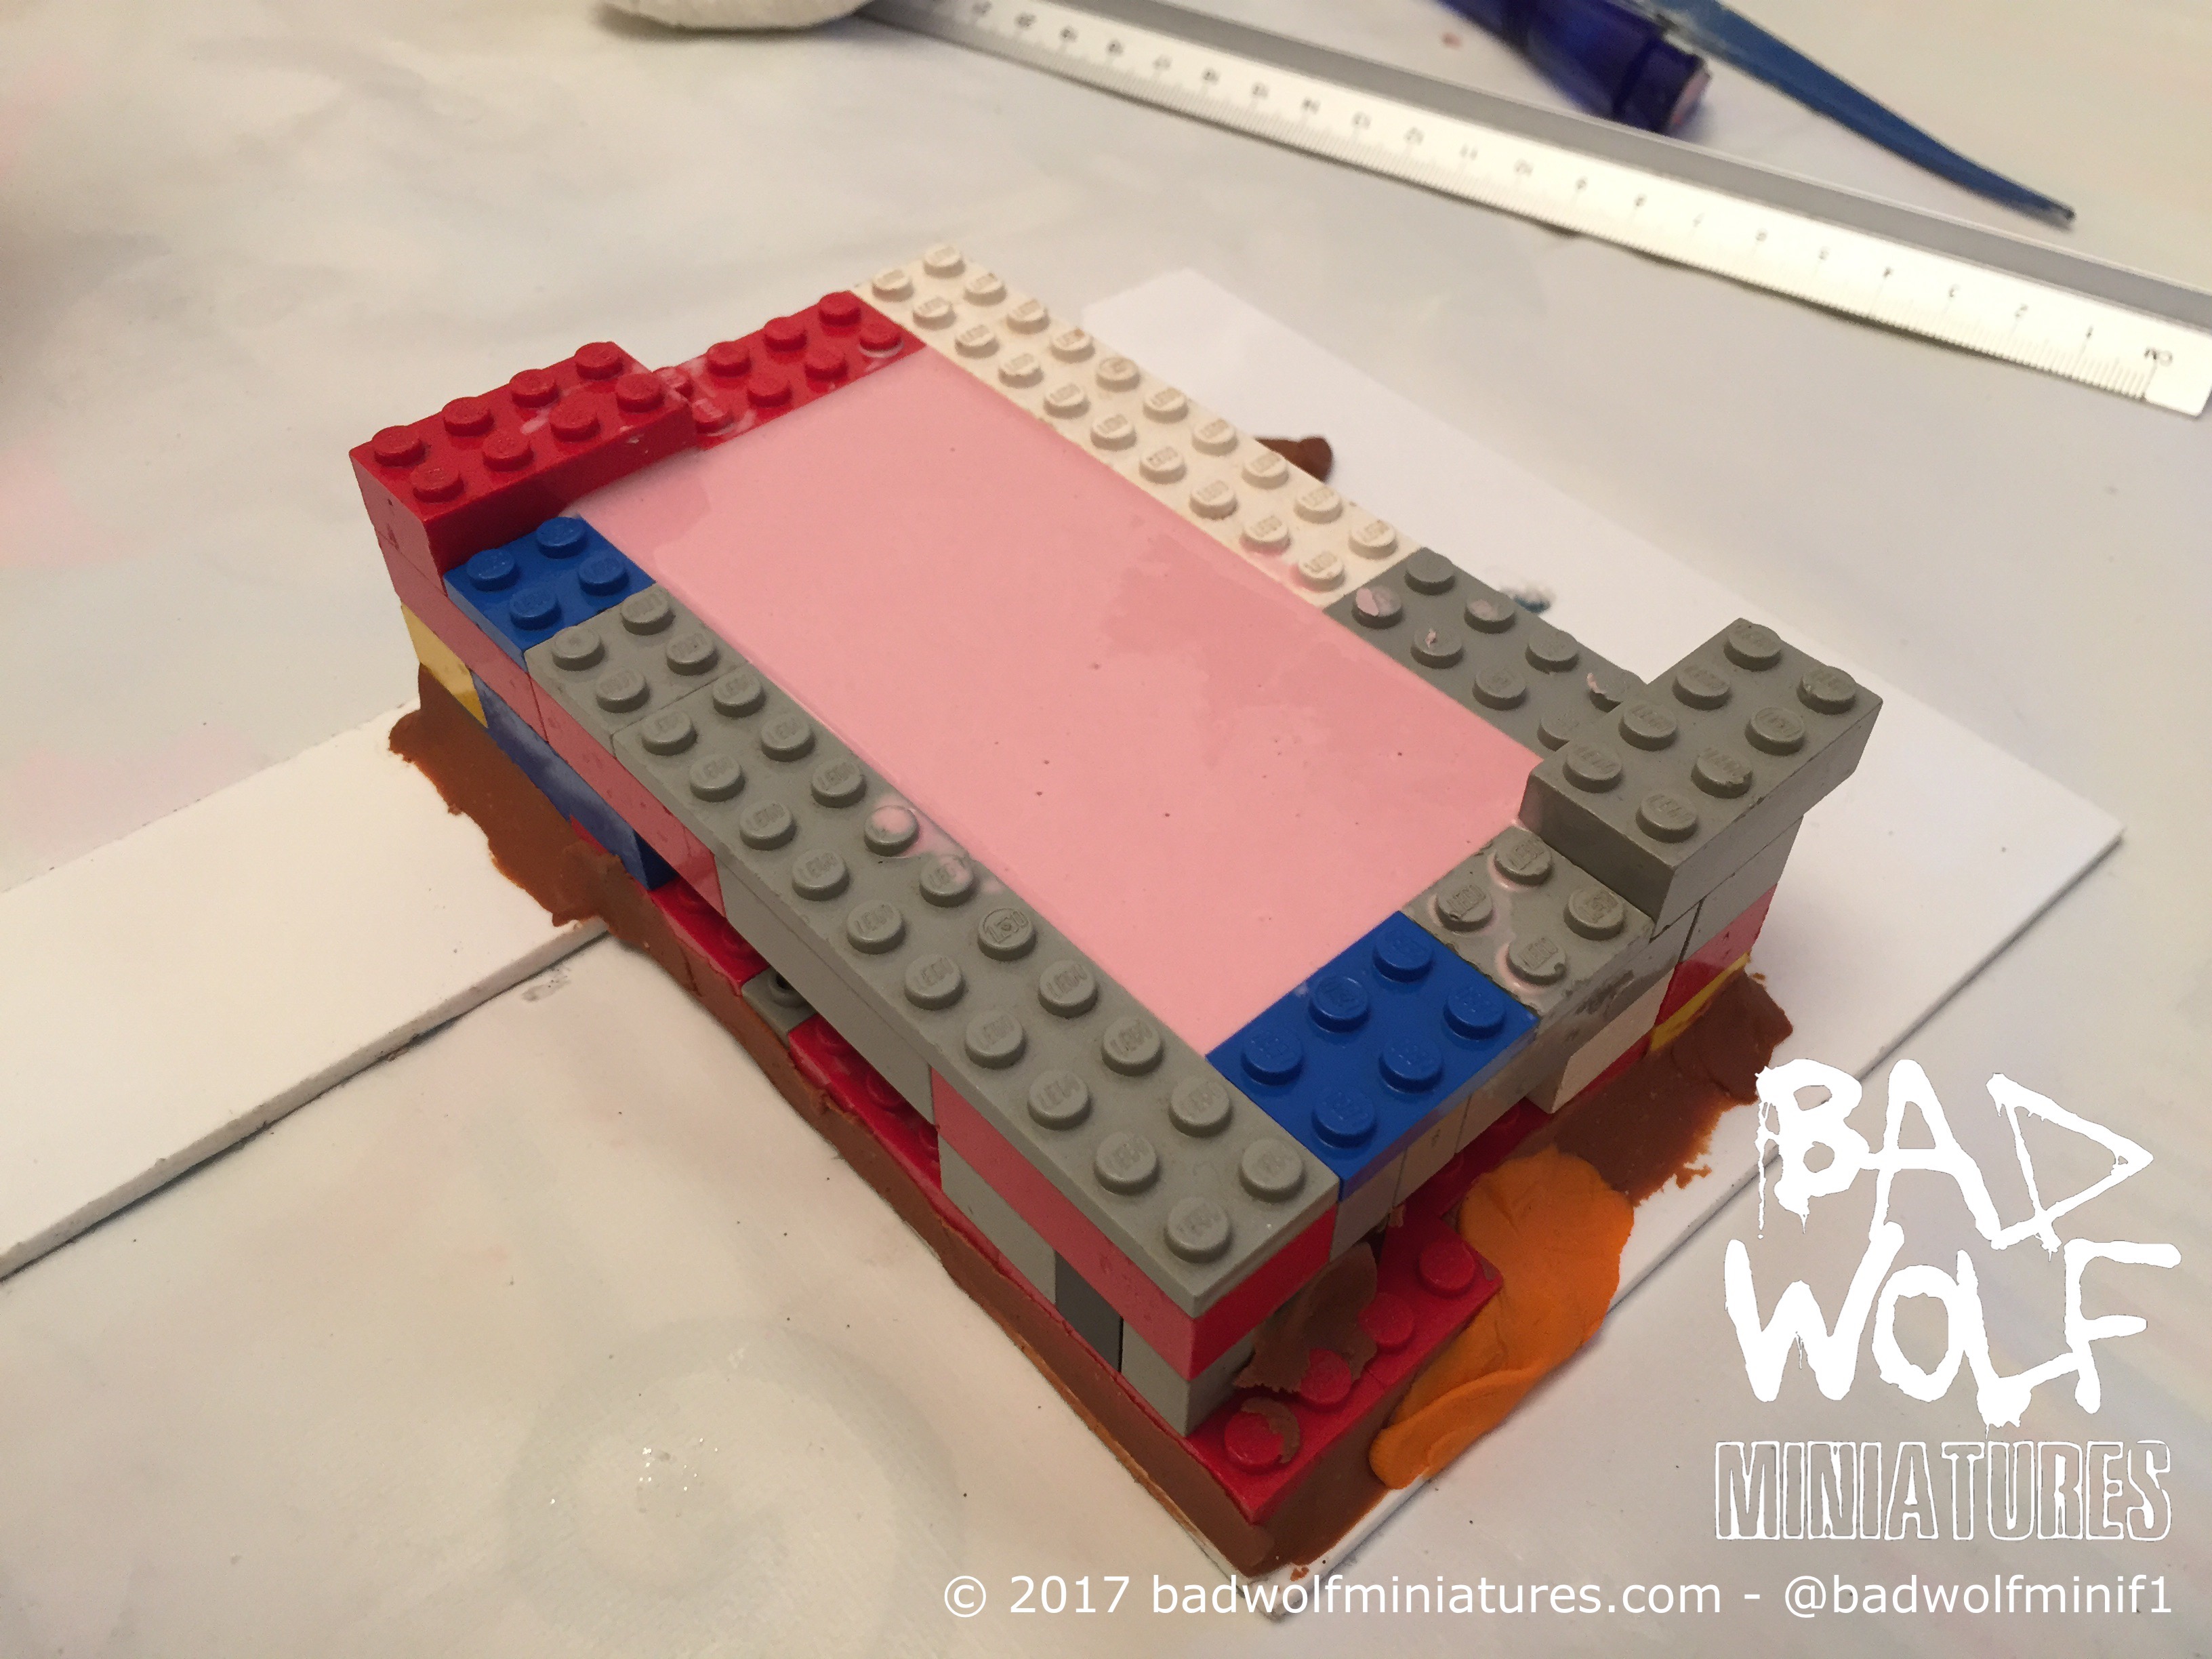
After leaving to set, I removed the mold from the box of Lego and set about taking the wooden pattern out… and this is where I hit difficulty!! With this being my first ever attempt at molding and casting, I had never had experience of separating two halves of a mold before; in this instance I had clearly not used enough mold release agent, and the two halves of the mold had simply stuck together. Fortunately, I was able to cut around the pattern using a sharp scalpel blade and release it from the mold. Having made this narrow escape, the next stage was to start mixing the resin and casting the pieces.
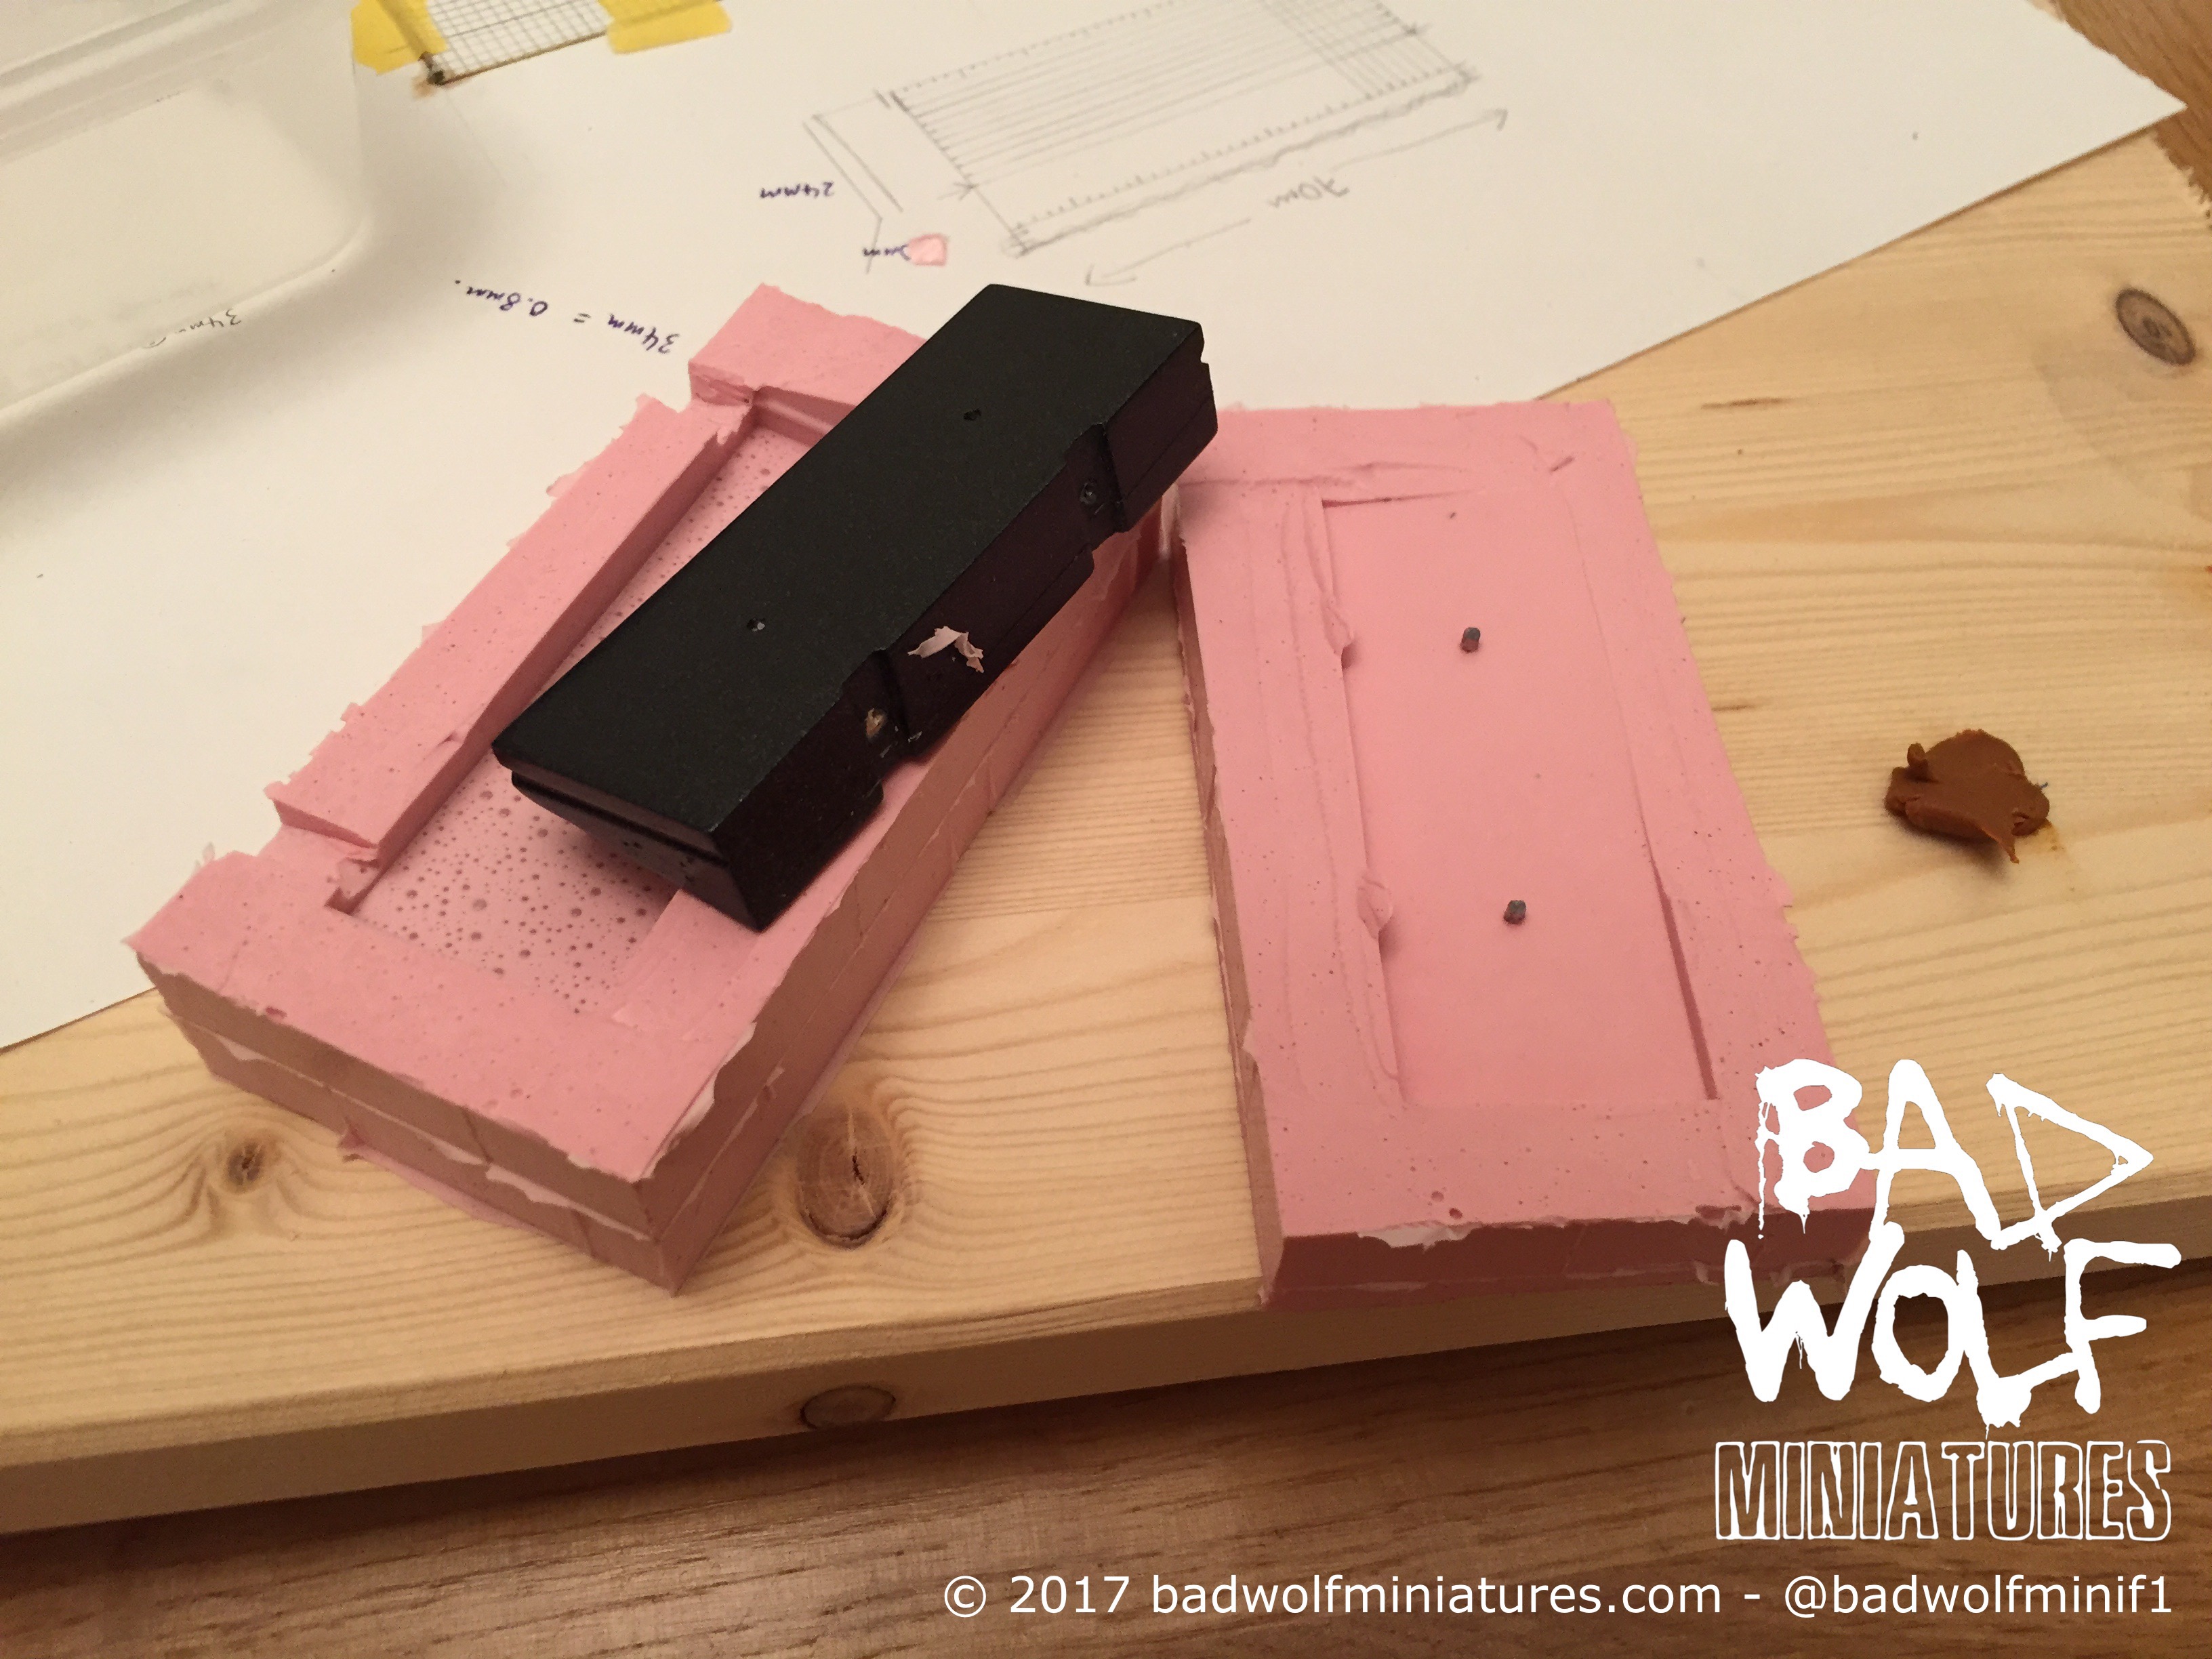
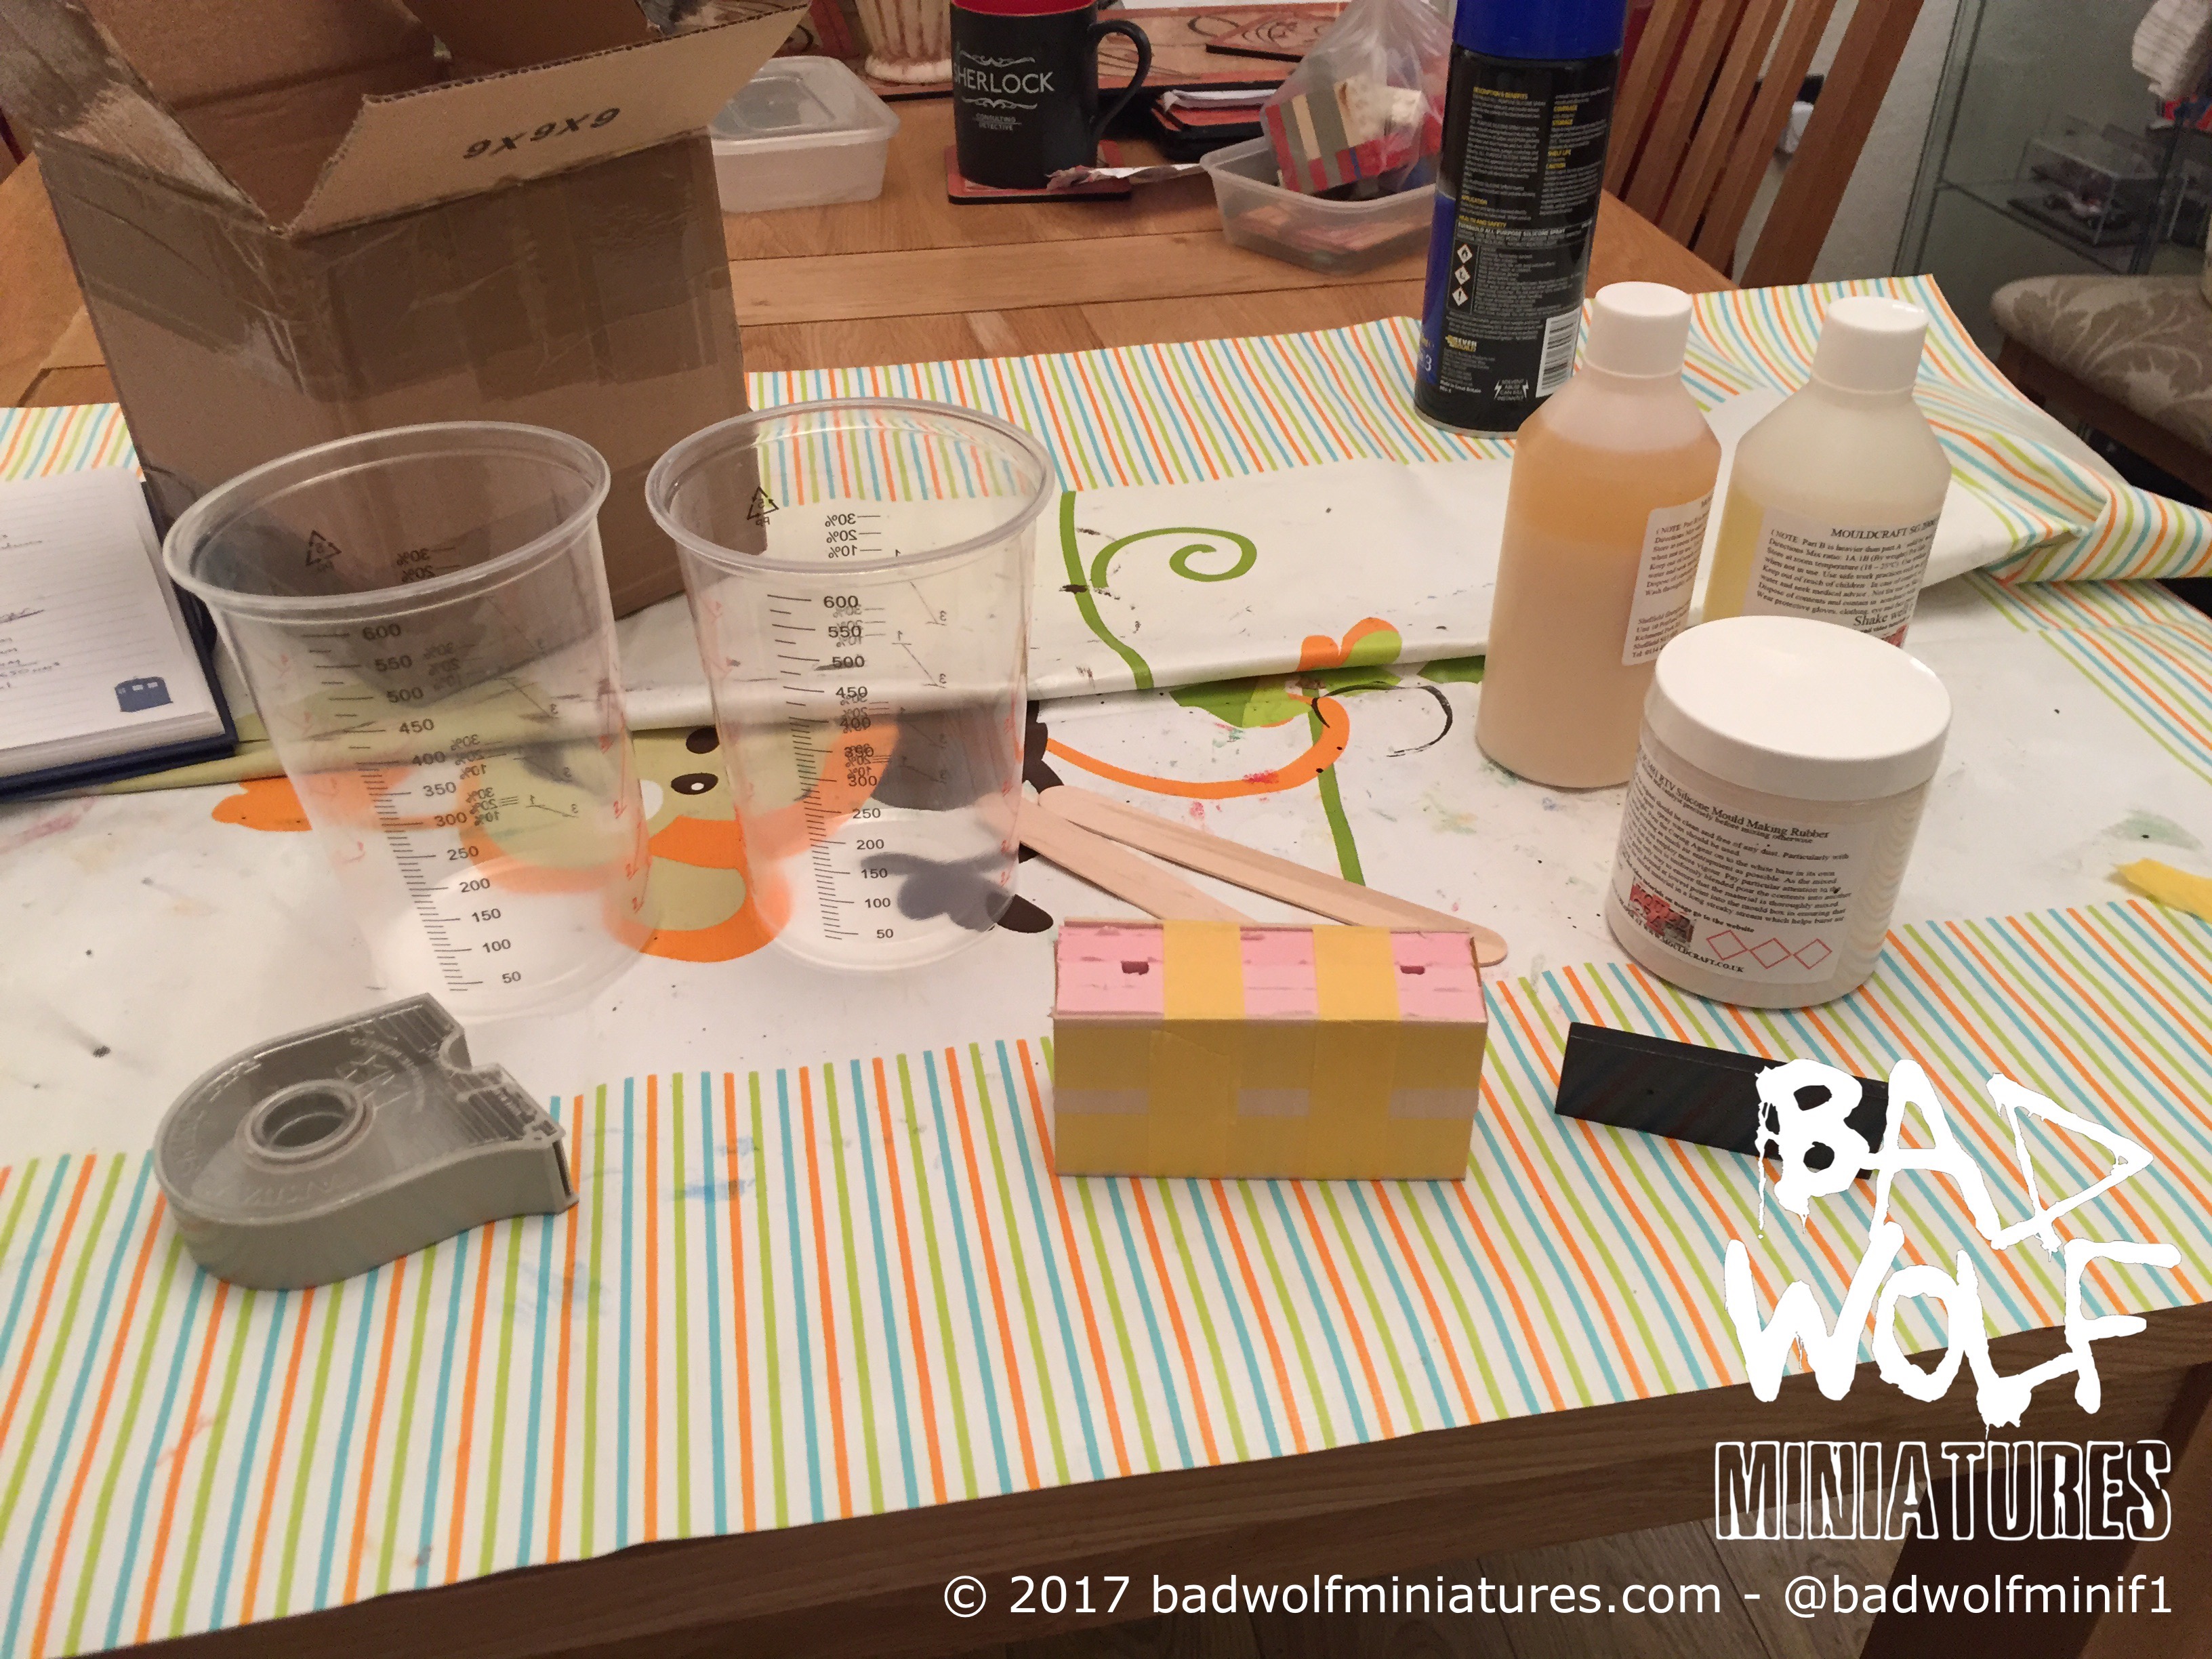
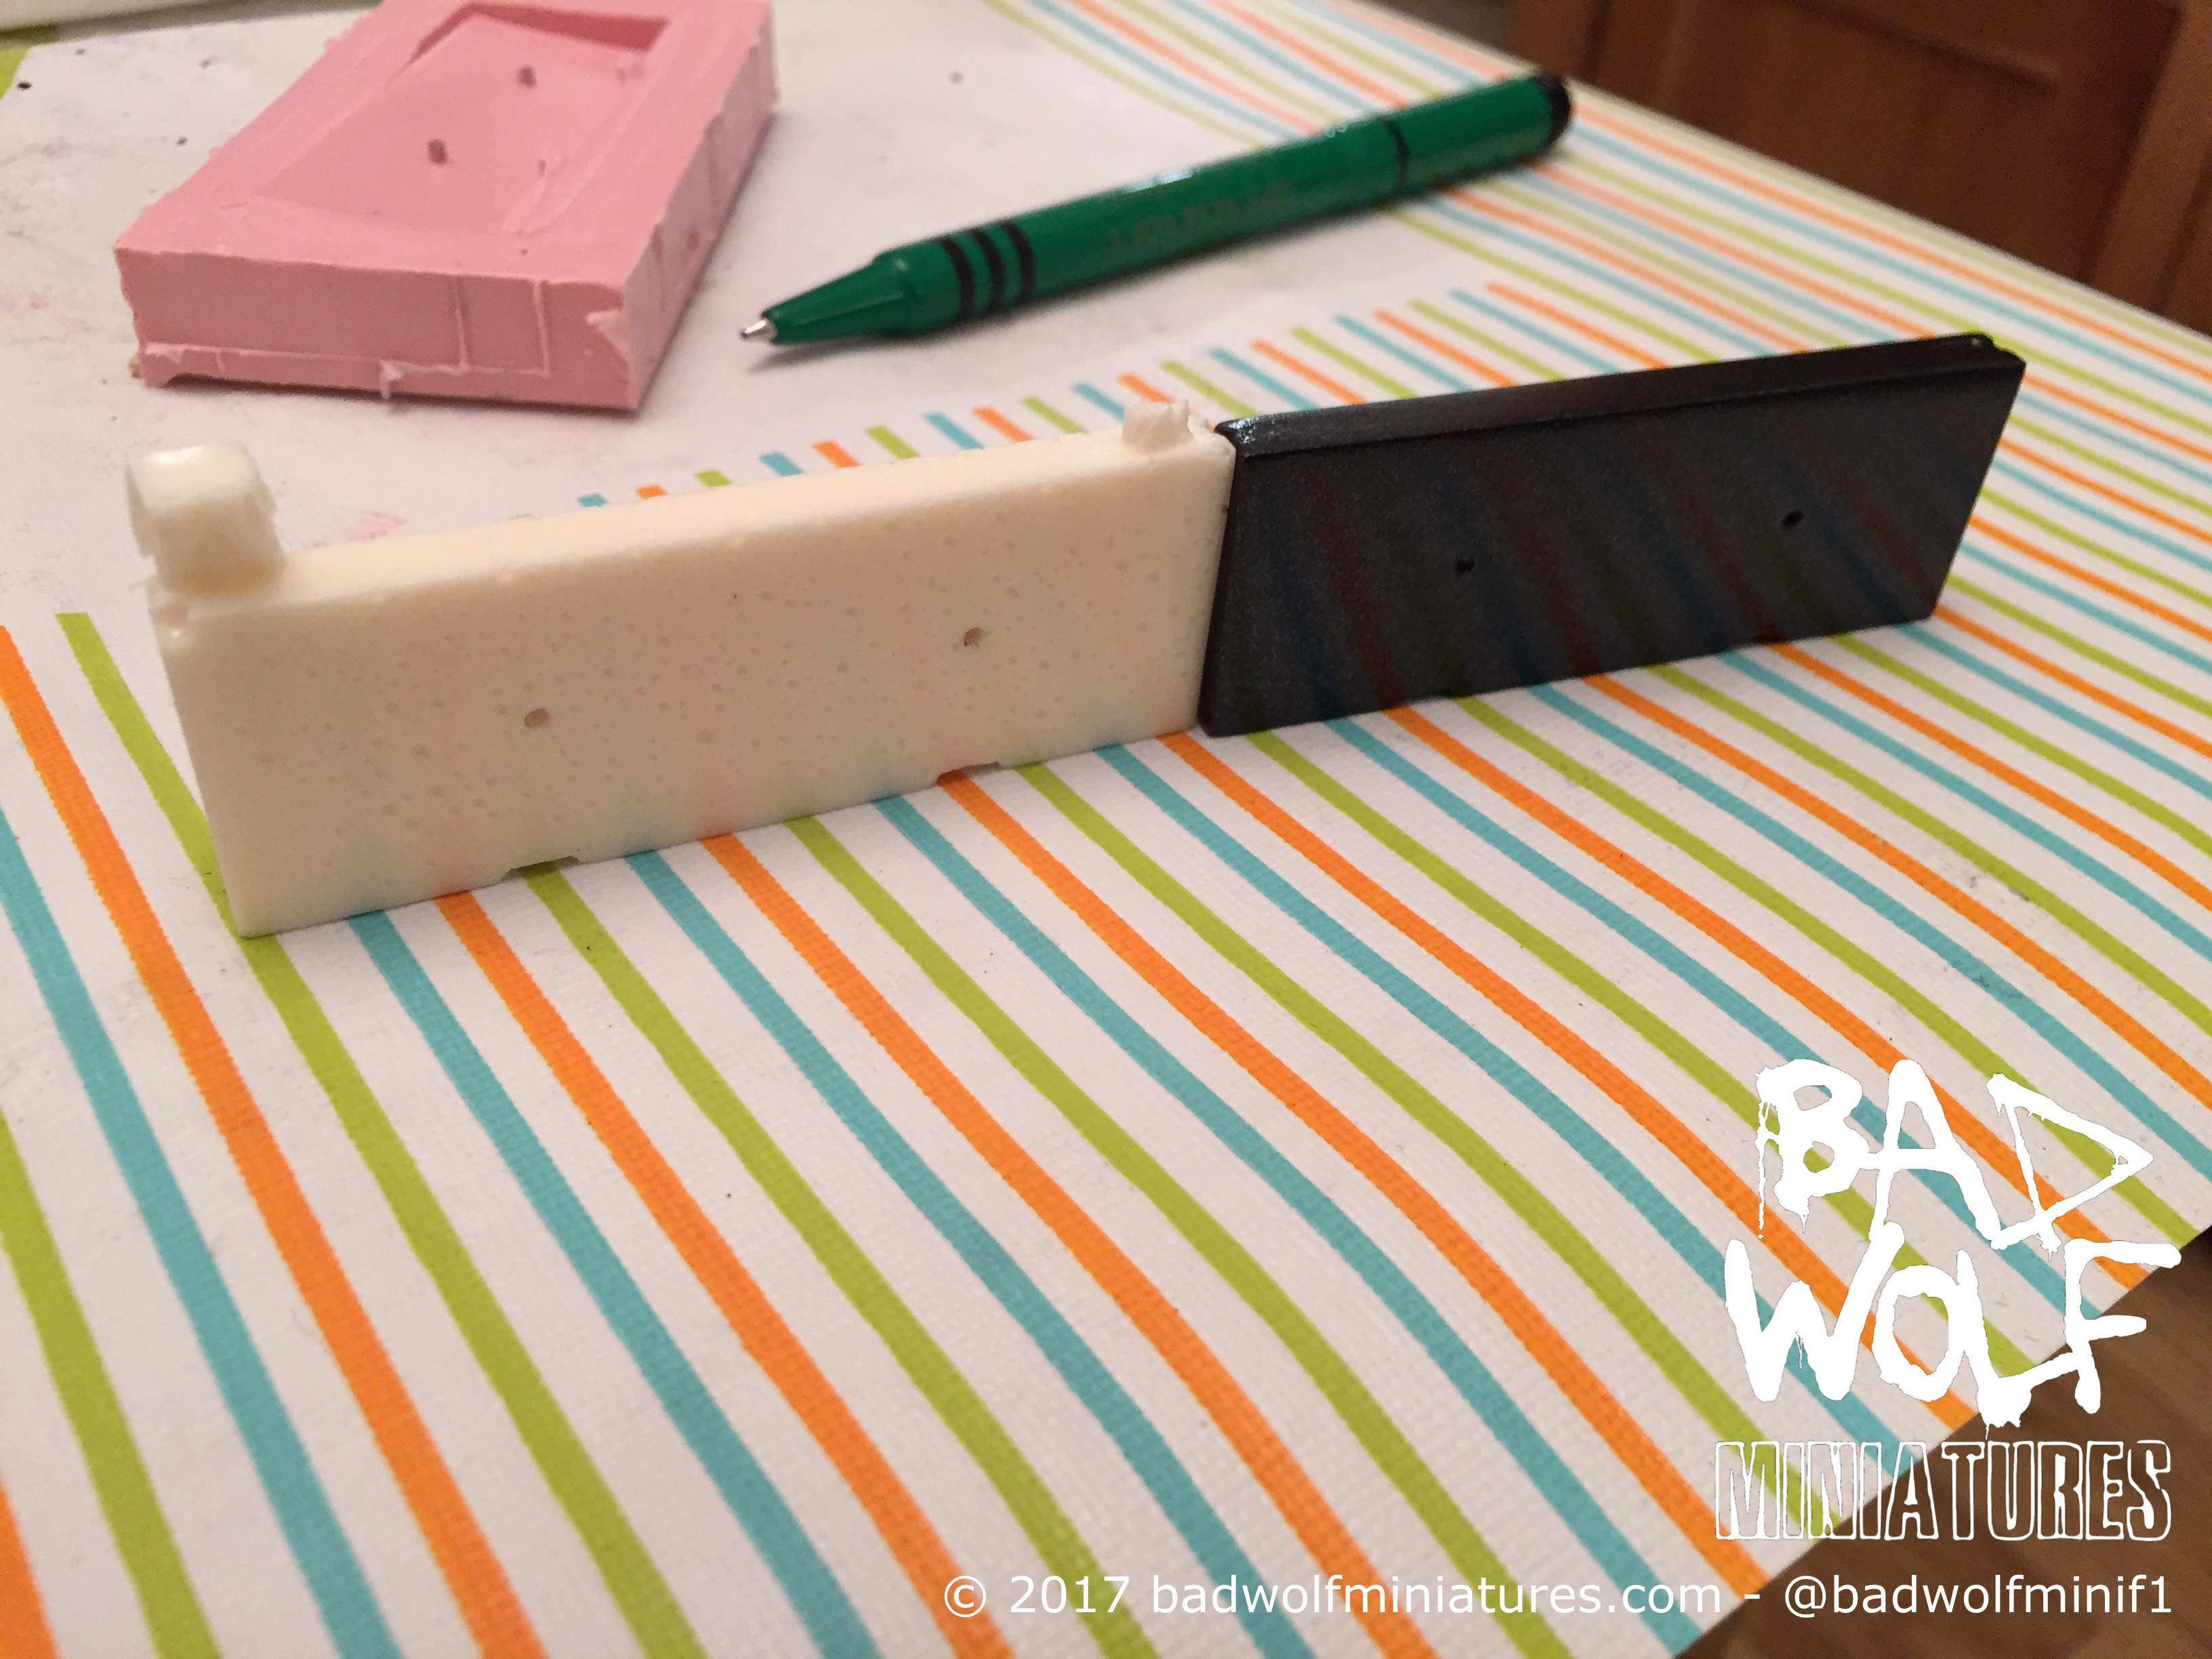
Overall I was very satisfied with the way the moulded parts turned-out. I did have a slight issue with bubbles being cast into the silicone (which replicated themselves on the cast pieces), but this is all experience that I would learn from if I was to use this technique again in future.
A wooden pattern which took me a good few days to make, can be duplicated in a few minutes using this simple process, and it is is one which I would very highly recommend.
As mentioned above, I did have an issue with some bubbles appearing in the outer faces of the wall pieces, but I was able to fill these with Humbrol model filler and then sand flush. A few of these dents and bubbles remained visible, but a “happy accident” from this was that it added to the “concrete” texture of these pieces.
Now, due to its very distinctive texture, successfully recreating concrete in cement is notoriously difficult. I had read in a railway modelling forum that Plastikote Suede texture paint was a good way of recreating concrete’s distinctive surface and hue, so thought I would give it a try.
I spayed the wall pieces in the suede texture paint (which had a “tan” colour), before gently misting the piece with grey primer. This subtle mix of yellow and grey replicated the hues in real concrete very well. A light dry brushing with a light grey to bring out the highlights really did the trick, and I was delighted with the results.

Once the concrete blocks had been cast and painted, my next task was to recreate the metal fencing which sits on top. Having referred to the period photos, I established that the chain linking was square and tried to gauge the size of the individual openings. I considered making my own fencing from brass rods and soldering, but my experiment with soldering was not successful, and resulted in a pile of bent brass rods and a burnt finger!!
I decided that using a manufactured mesh would be more straightforward, so after much searching managed to find some via eBay.
The mesh was cut to size, and the edges were “sealed” using superglue to stop the frayed ends from separating. I left longer strands on either end which were wrapped around the fence poles (made of brass) to replicate the originals.

With the fencing in place, my attention turned to the spectators behind the fence. The source photographs showed the spectators were stood behind a green, yellow and white taped fence, which from further investigation seemed to be of standard use at Australian Grand Prix both before and since:
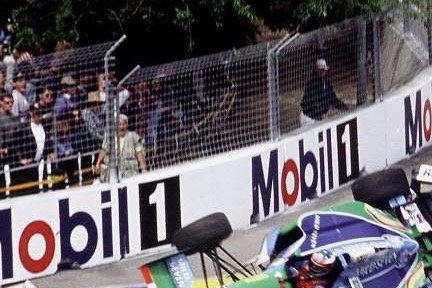
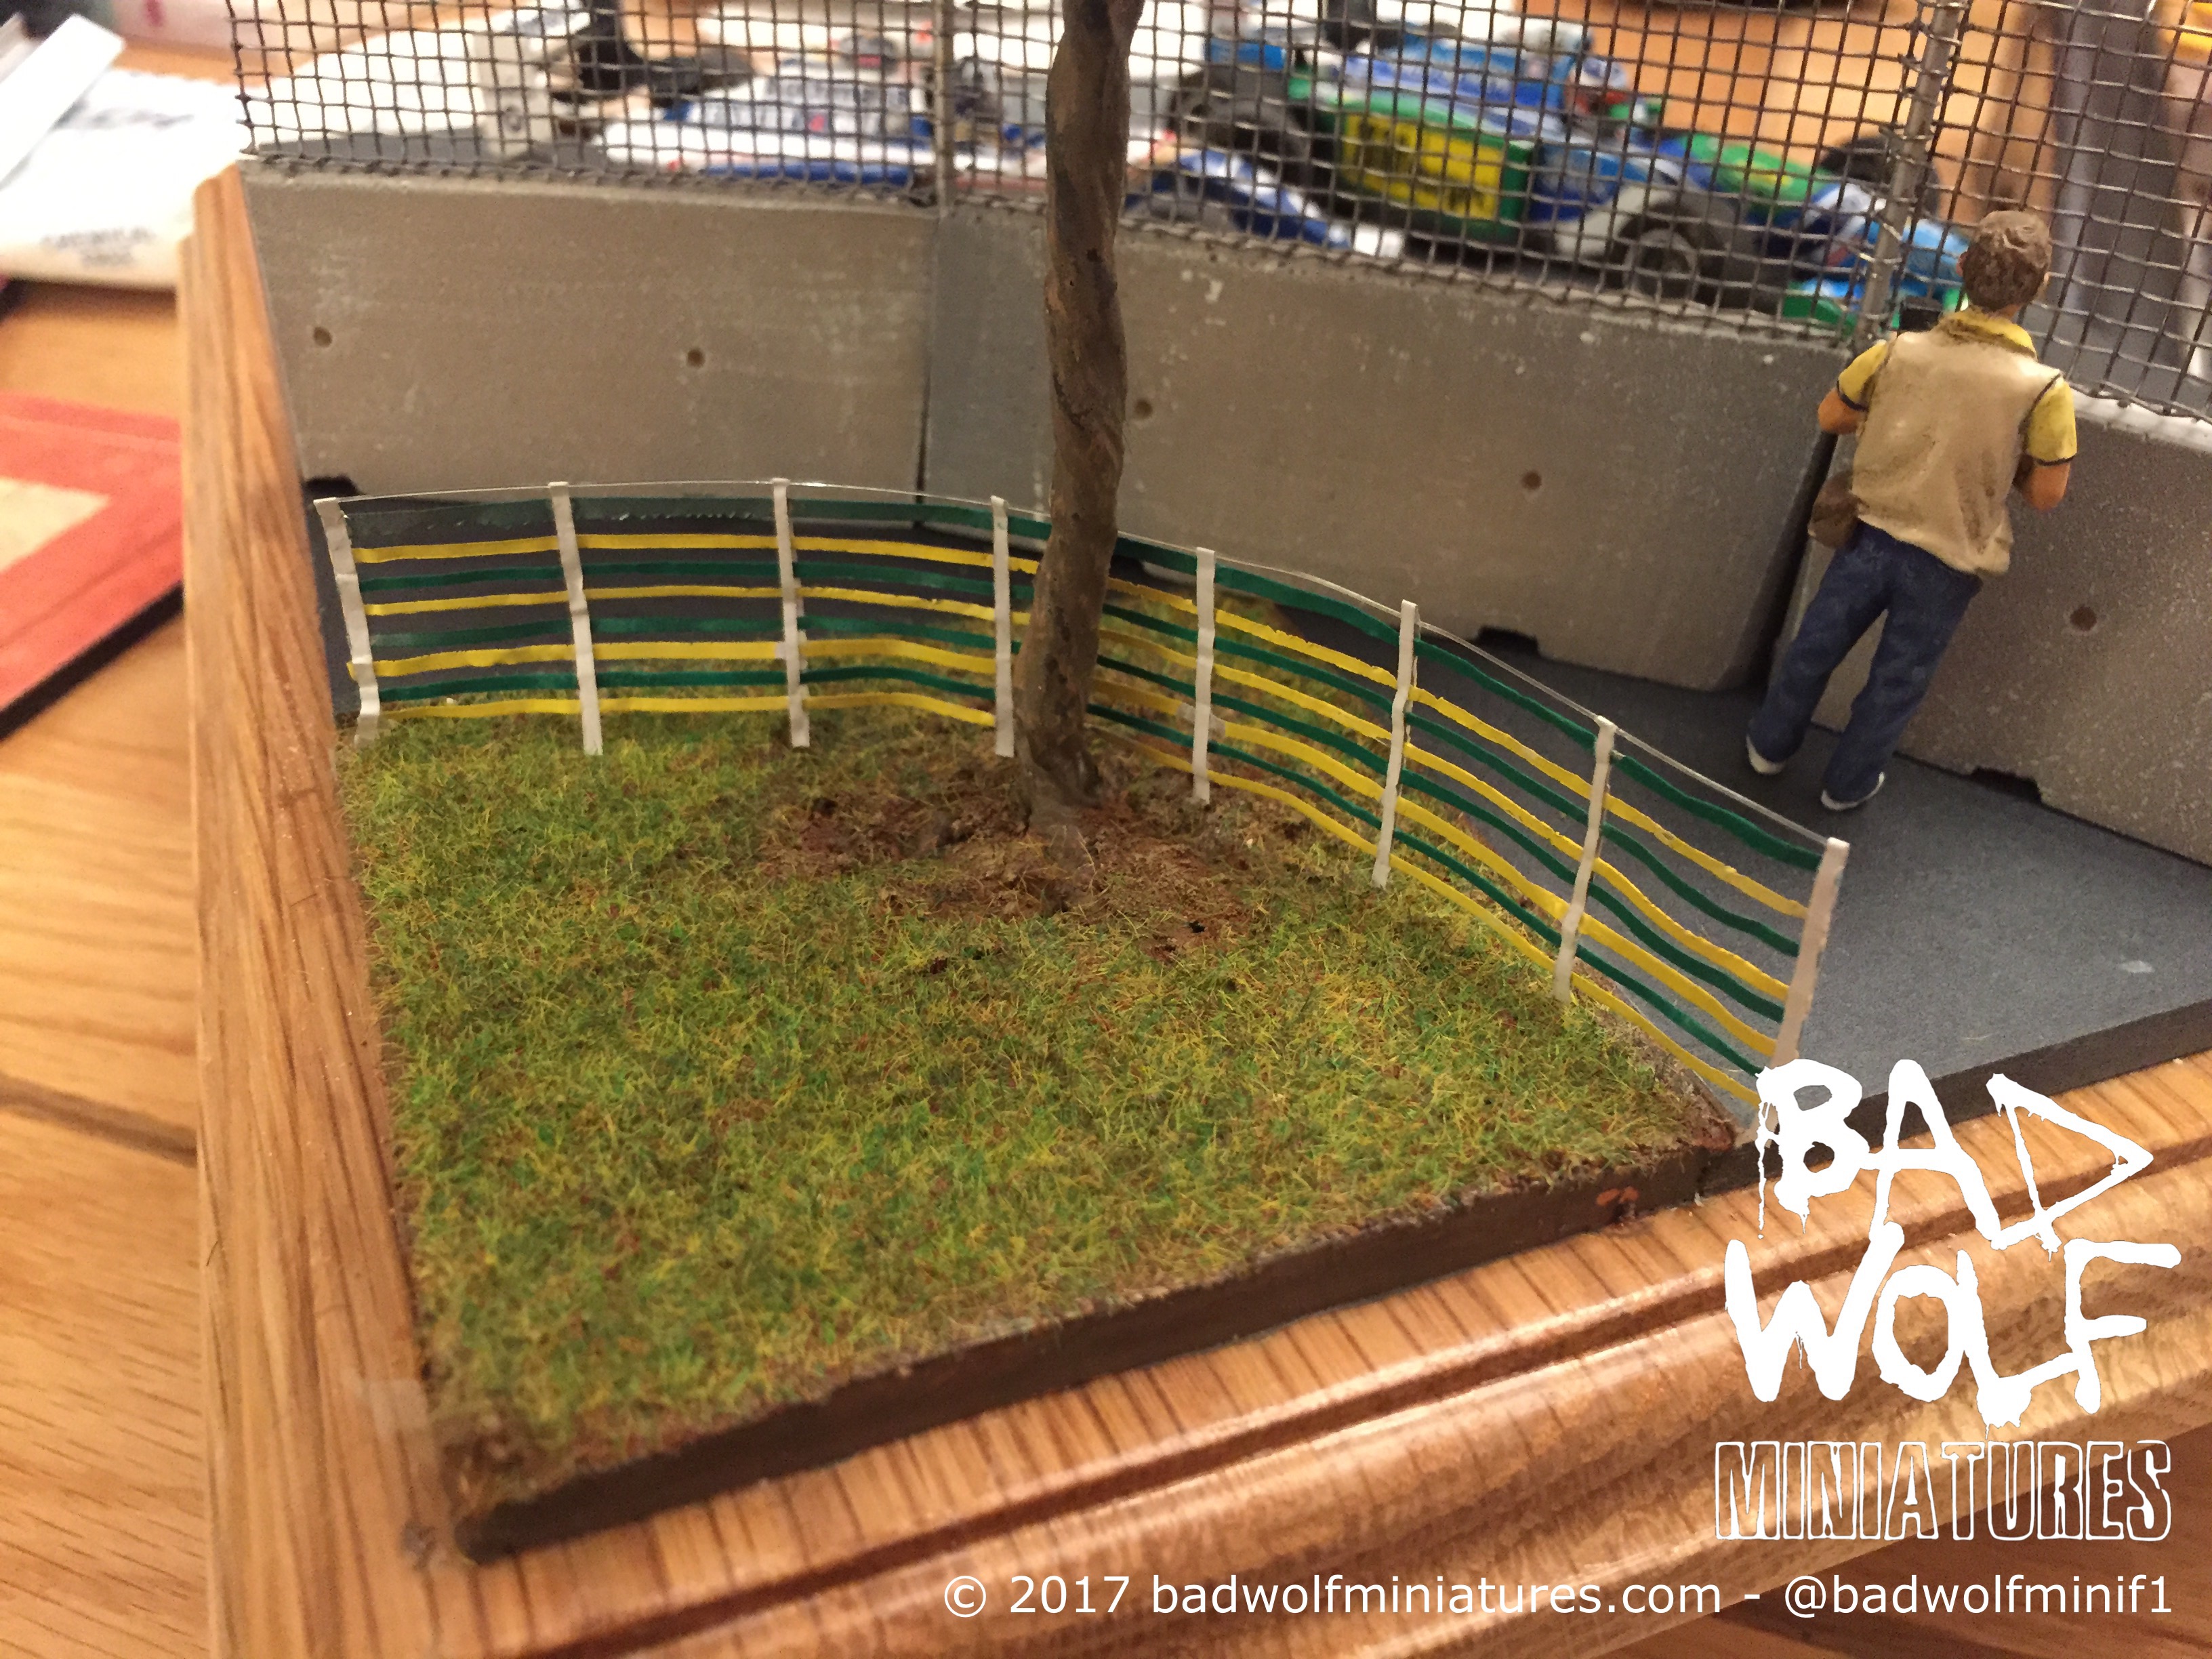
I recreated this fence using tin foil which I painstakingly cut into strips c.1mm thick using scissors. The strips were then spray painted, before being glued into position with a thin braid of fibre optic running along the top edge:
With the fence in place, my next task was to recreate the crowd of spectators. In my experience, by far and away the best range of figures in this scale are manufactured by Denizen miniatures. Whilst their range is extensive, and features an enormous choice, there were not enough amongst their “spectator range” to fill out this spectator area. Whilst I was reluctant to stray from Denizen and their quality, I was able to source a number of figures from the TrackPass range. Whilst not quite of a quality comparable to Denizen, their figures certainly added some variety (in particular the photographer standing at the concrete wall, and a spectator leaning forwards at the rear).
The gaps in the scene were filled with resin-cast figures made for O-Gauge model railway layouts (at a roughly comparable 1:48 scale). As far as the figures go, these are the “weak link” in the piece, as they are very roughly cast and have a far lower level of definition and quality about them (especially when compared to Denizen). However, they filled in the gaps and I tried to keep the Denizen and Track Pass figures to the edges of the scene where they are more clearly visible.
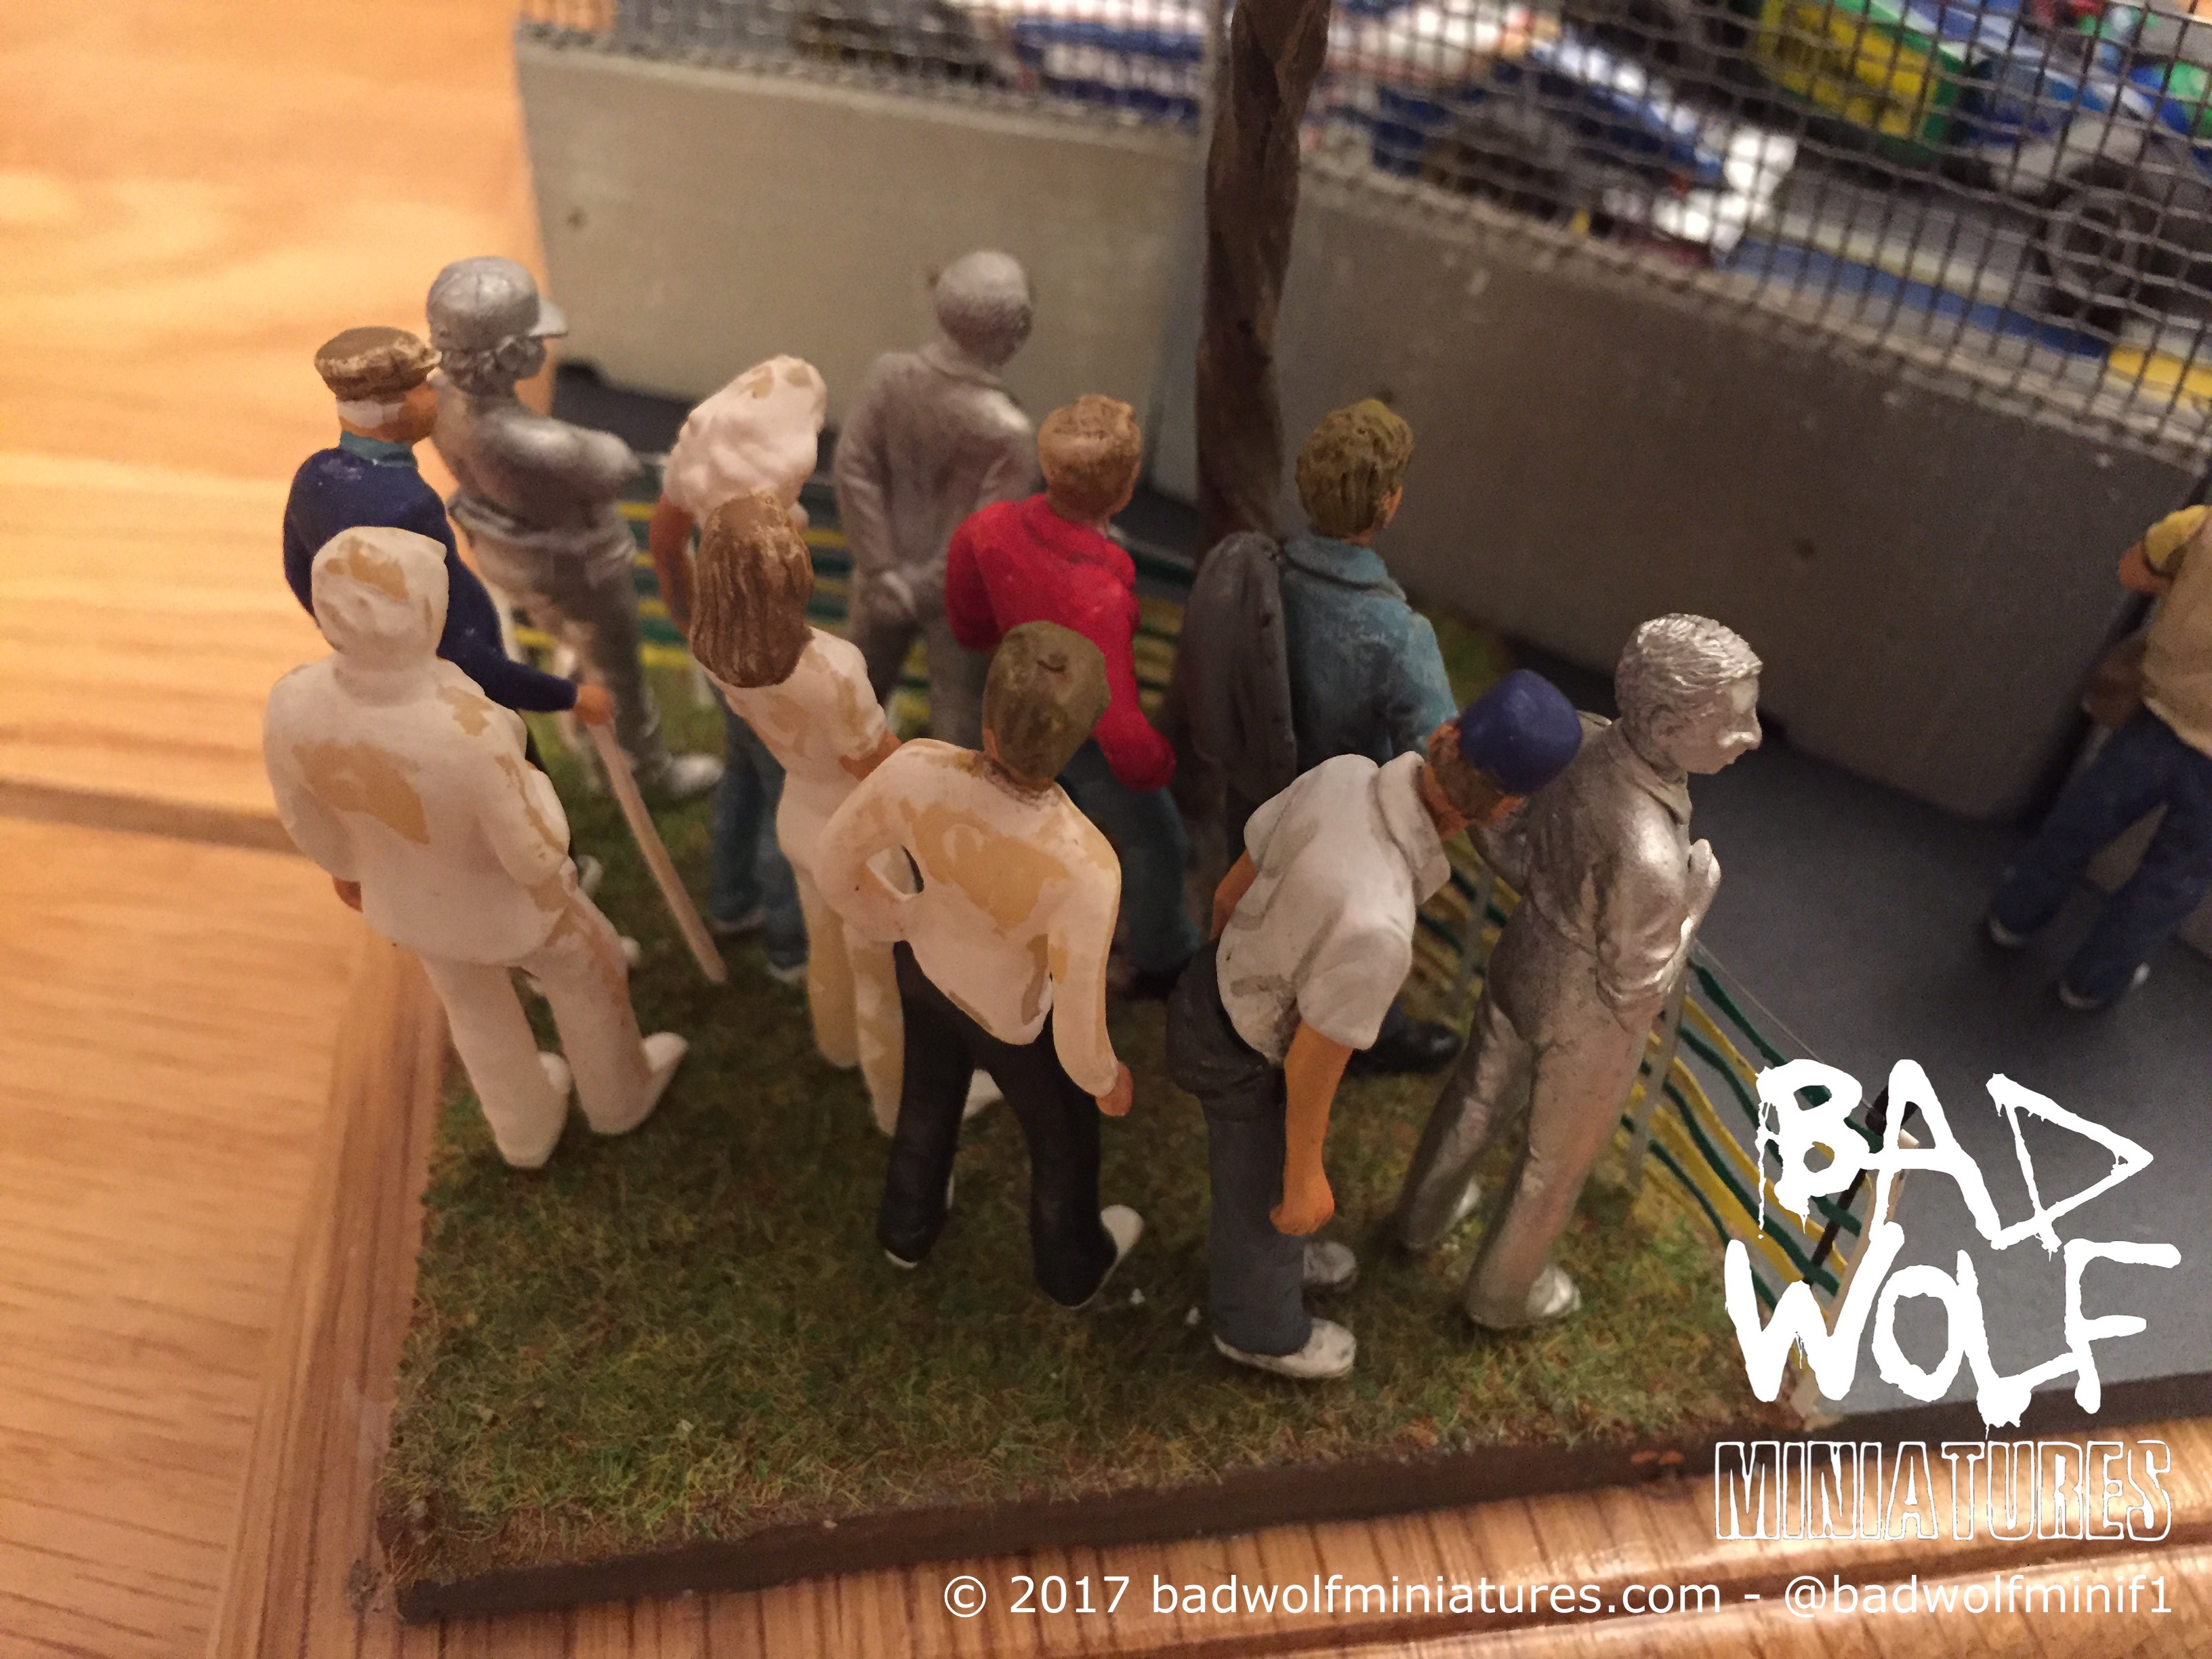
After some arduous painting (particularly of the resin-cast figures which needed more attention and effort to try and bring them to life), the crowd was finally assembled.

The diorama is now pretty-much completed. There are a few details to add to the cars (both carried cameras facing directly at the drivers’ faces, which are not included in either kit), and I will upload a complete gallery when the final touches have been added
Life outside of modelling is busy, so I am not sure when I will next be able to get started on another project. I plan that my next project will be a simpler affair, and have a few good ideas in the pipeline!
Thanks for reading this, and keep an eye out for the the completed diorama gallery.
Absolutely brilliant stuff!!
Congratulations on an incredible blog mate. The ‘89 and this ‘94 scene are just magic!! So hard to find dioramas of motor racing scenes that are true quality. It always seems to be a skill left to the military modellers.
Thank you so much for not only posting the photos but also revealing some of your techniques as well. Fabulous stuff!!
I know it’s always hard to find time to pursue hobby’s like this, but I had to leave a comment as a source for further inspiration.
Well done!! Thank you and keep up the fabulous work!!
Kind regards
Jack Byrne